We have a direct integration with QuickBooks Online - we do not rely on a 3rd party service like Zapier.
Financial data from 'Jobs' in Maidily will be created in your QuickBooks account as an invoice connected to a customer
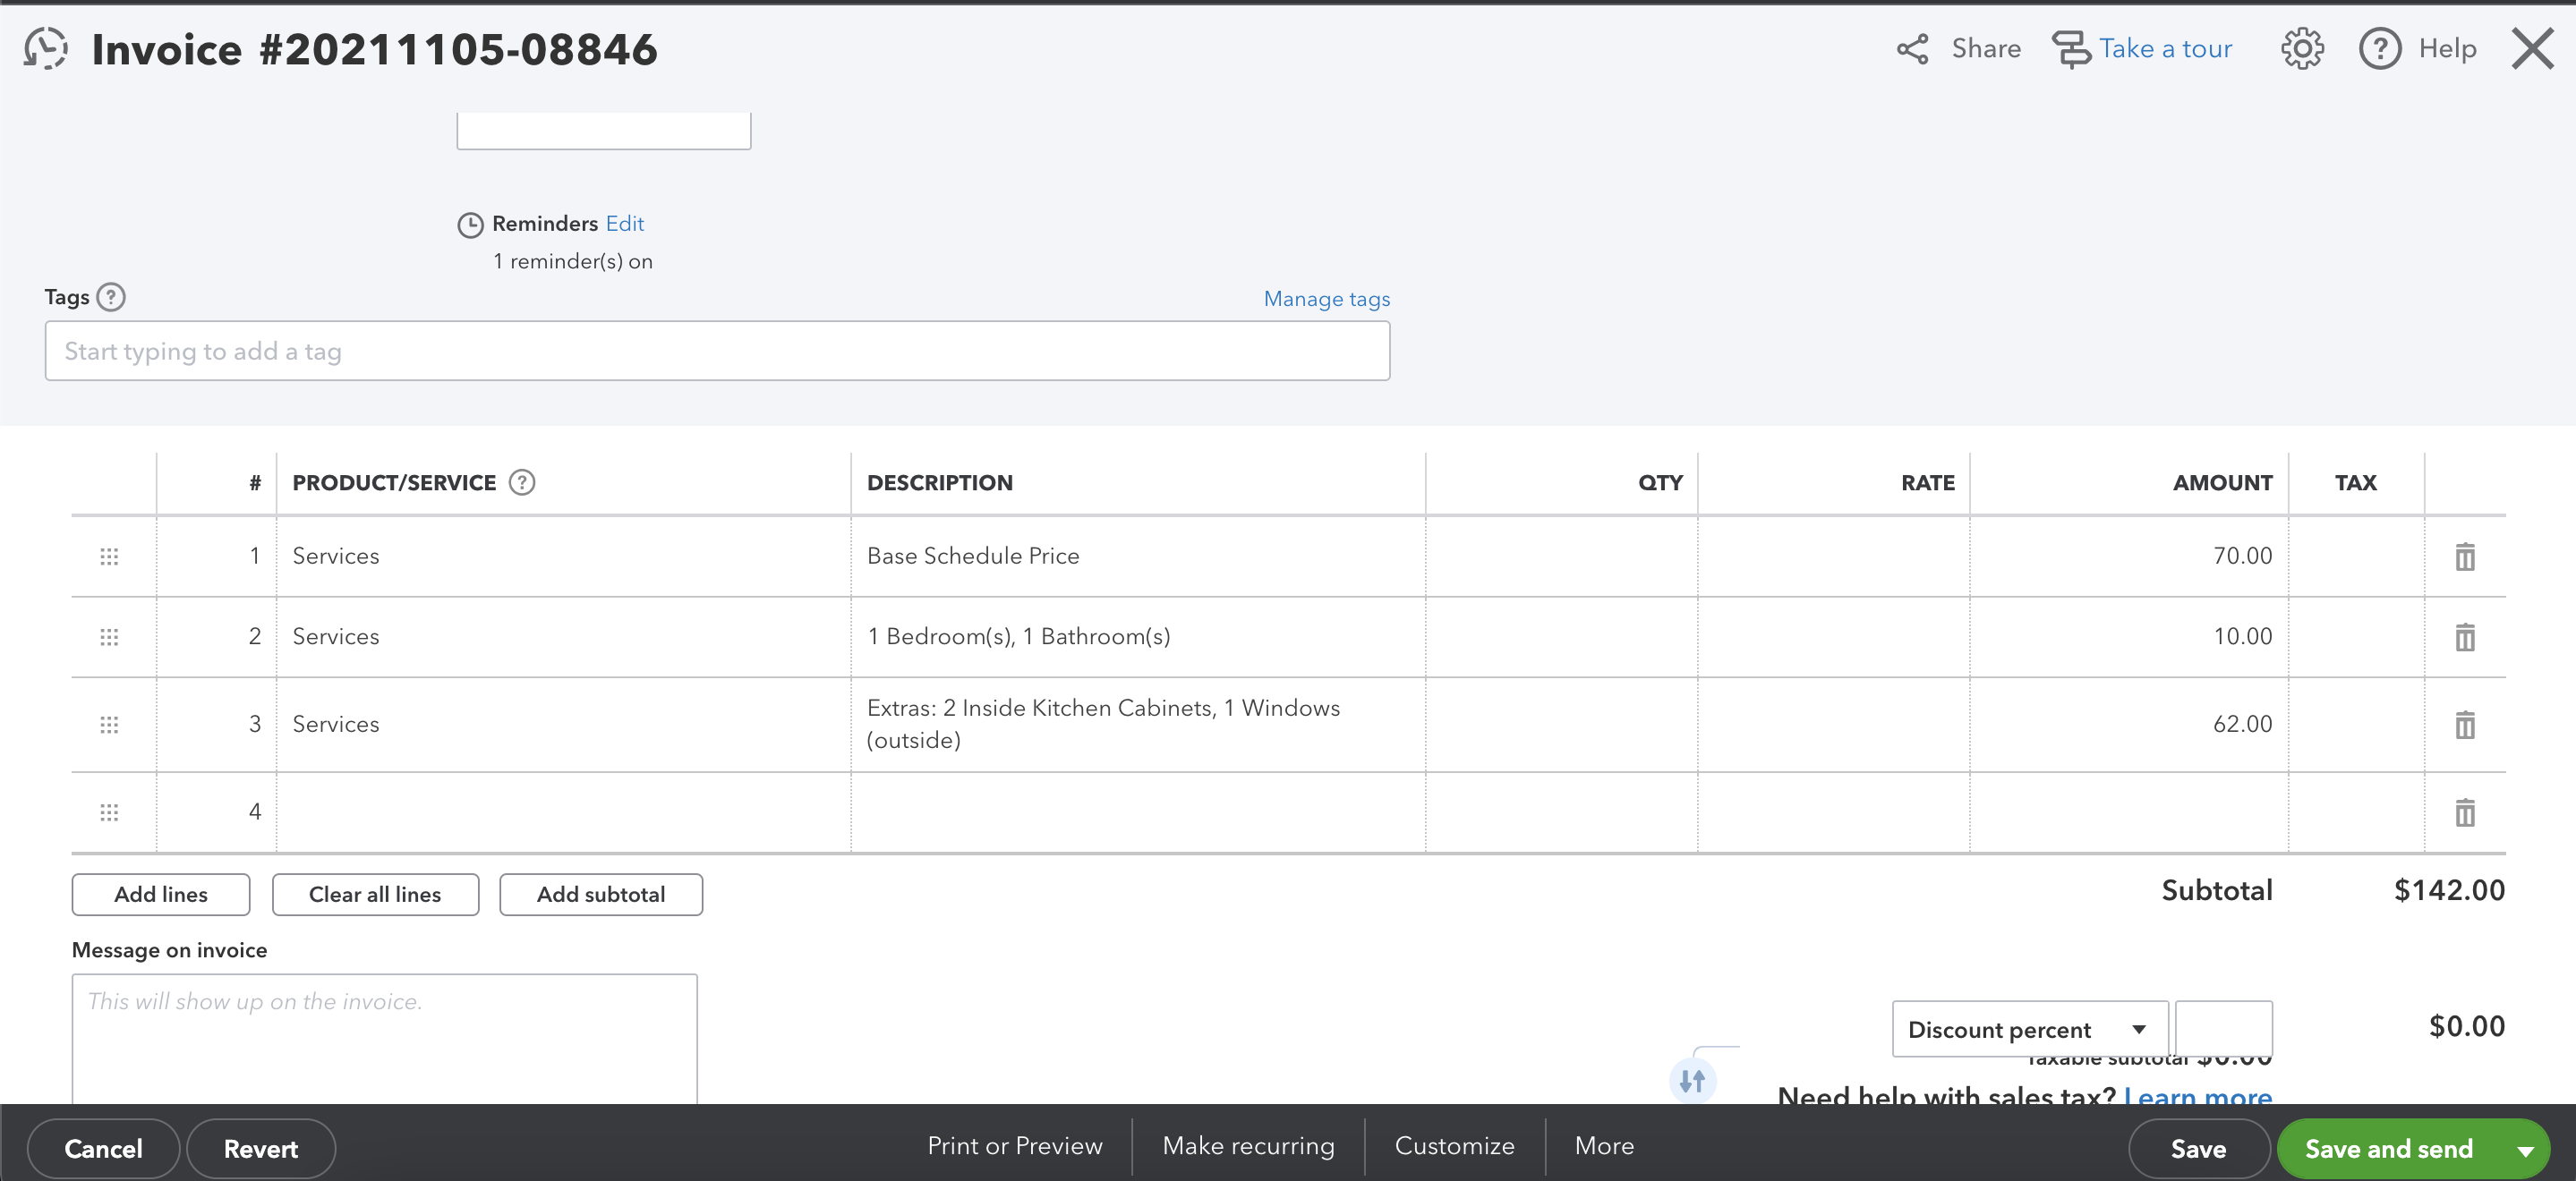.png)
Tax shows as a line item on the invoice in QuickBooks
There are 3 sections of data that will be synced:
- Customers
- Jobs
- Technicians
Technician pay rate (total working hours will NOT be transferred) will transfer into QuickBooks as 'Bill Rate' and will ONLY be transferred into QuickBooks if the pay method is hourly pay
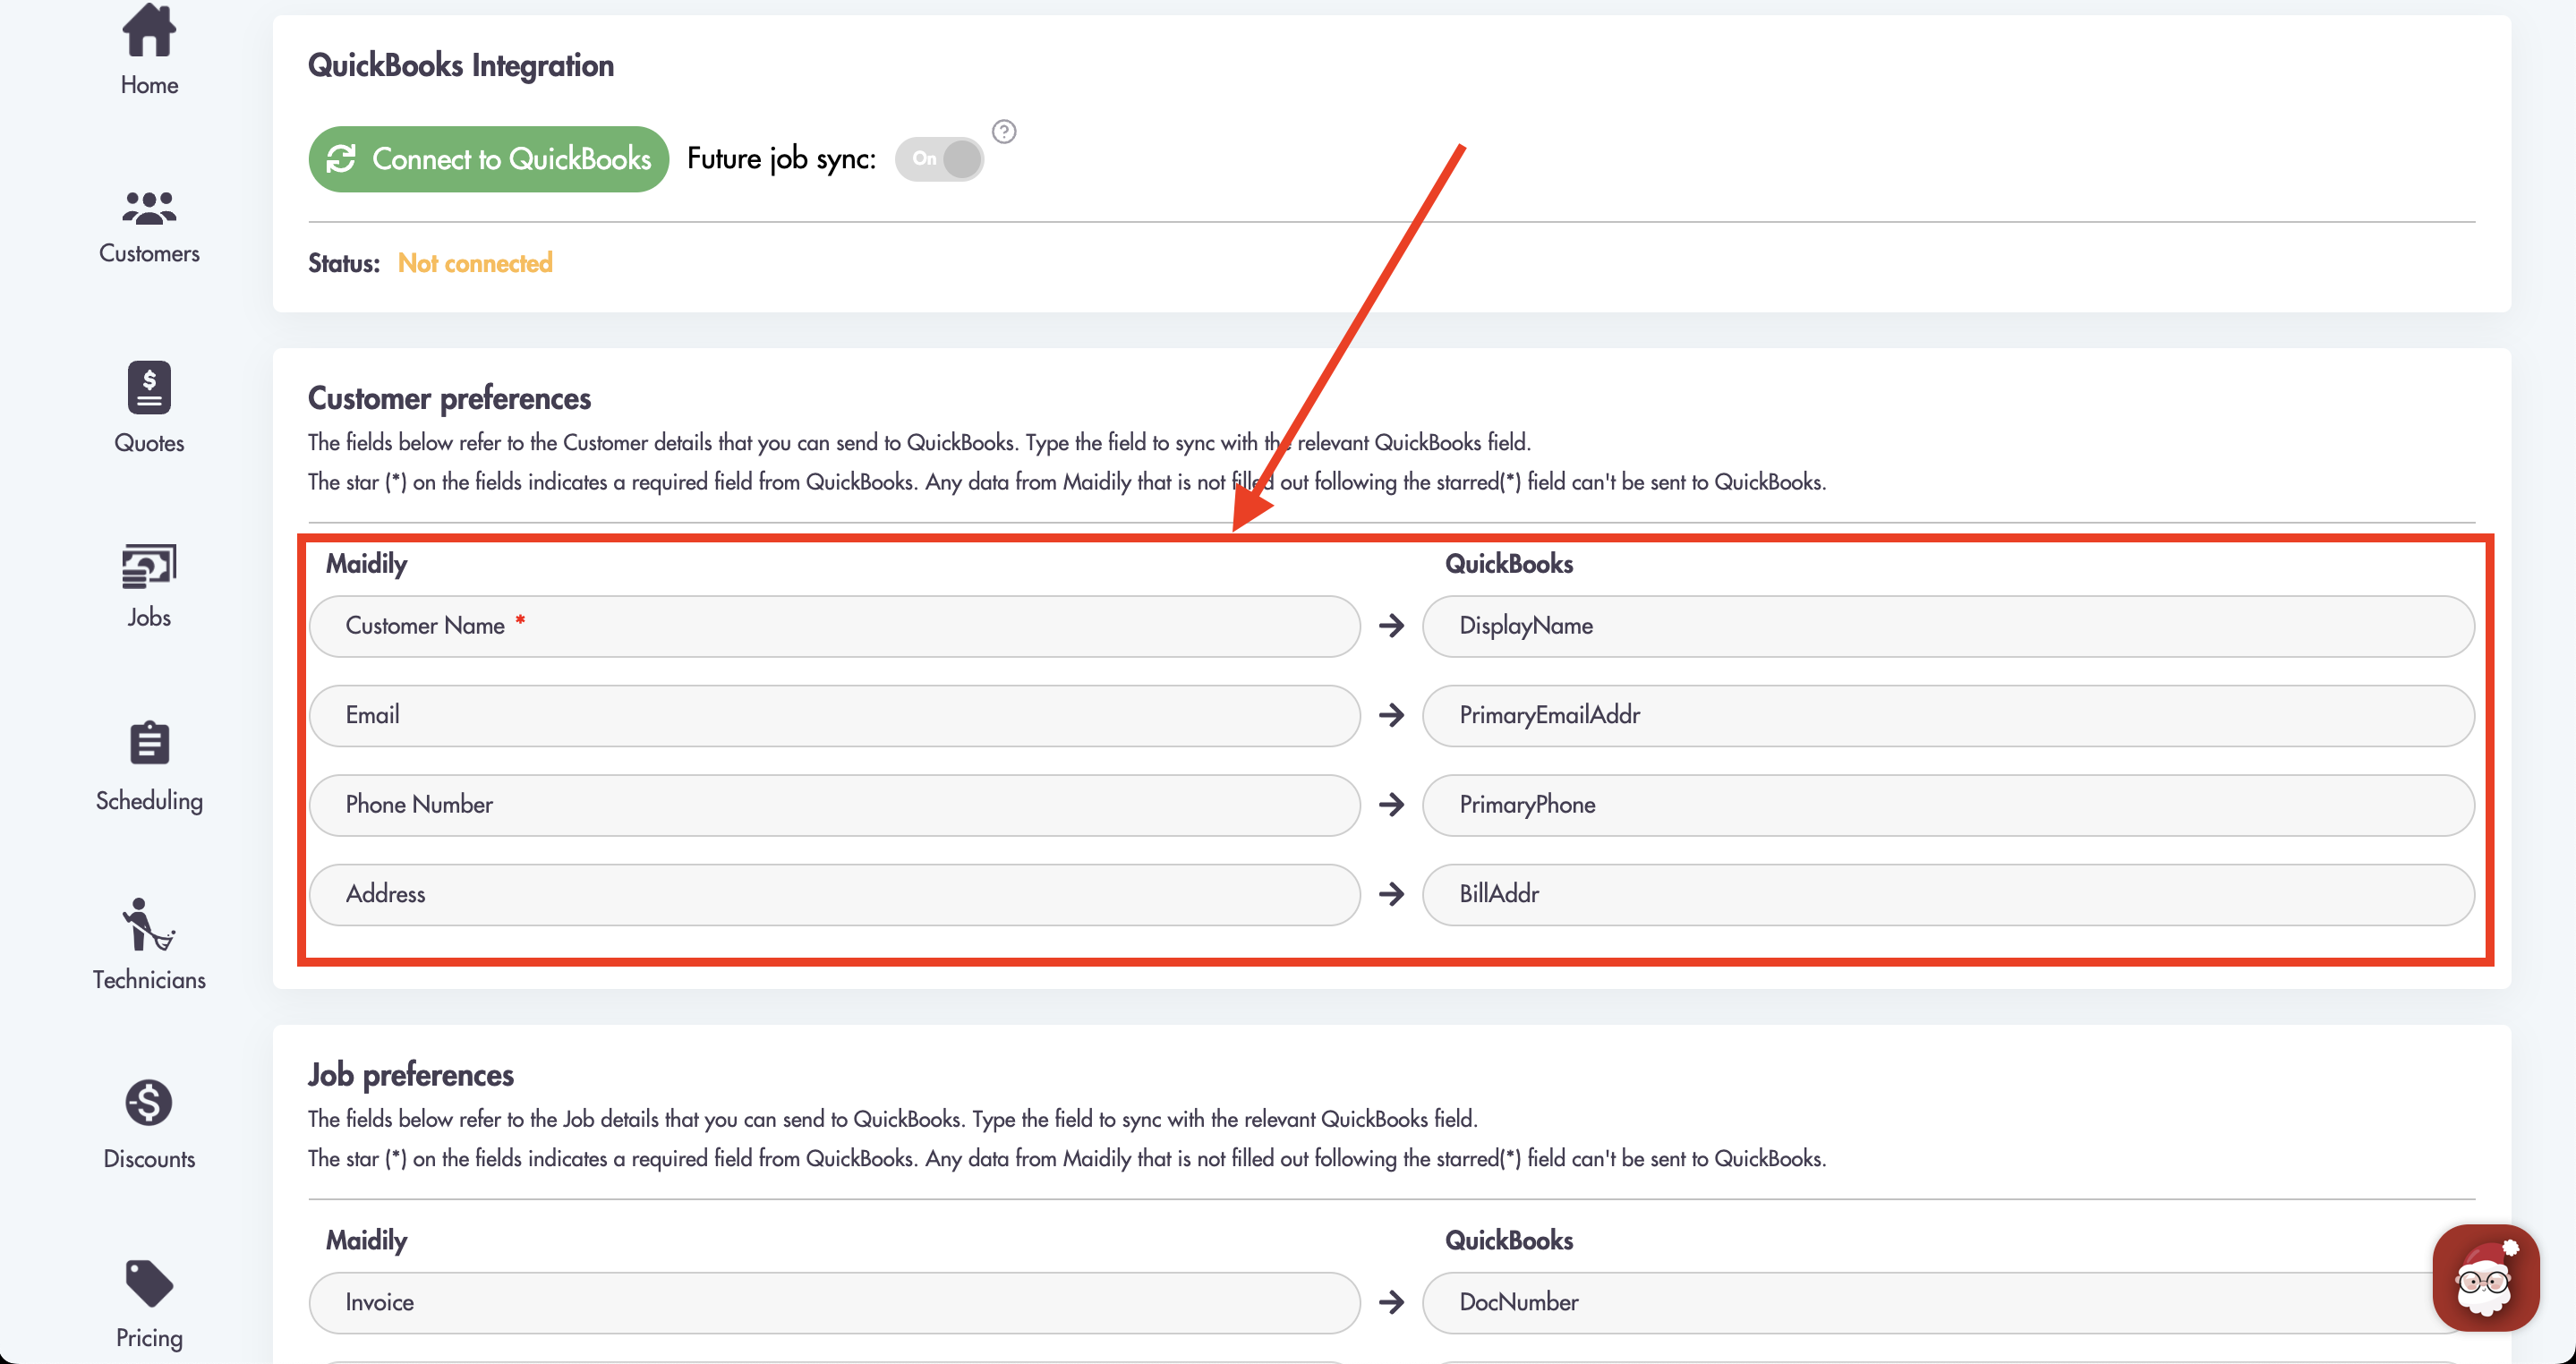
You can see all of the Maidily fields that will by synced with QuickBooks in Settings -> Integrations - QuickBooks
To sync future jobs with QuickBooks (will be created as invoices in the future) turn on the 'Future job sync' toggle switch in Maidily
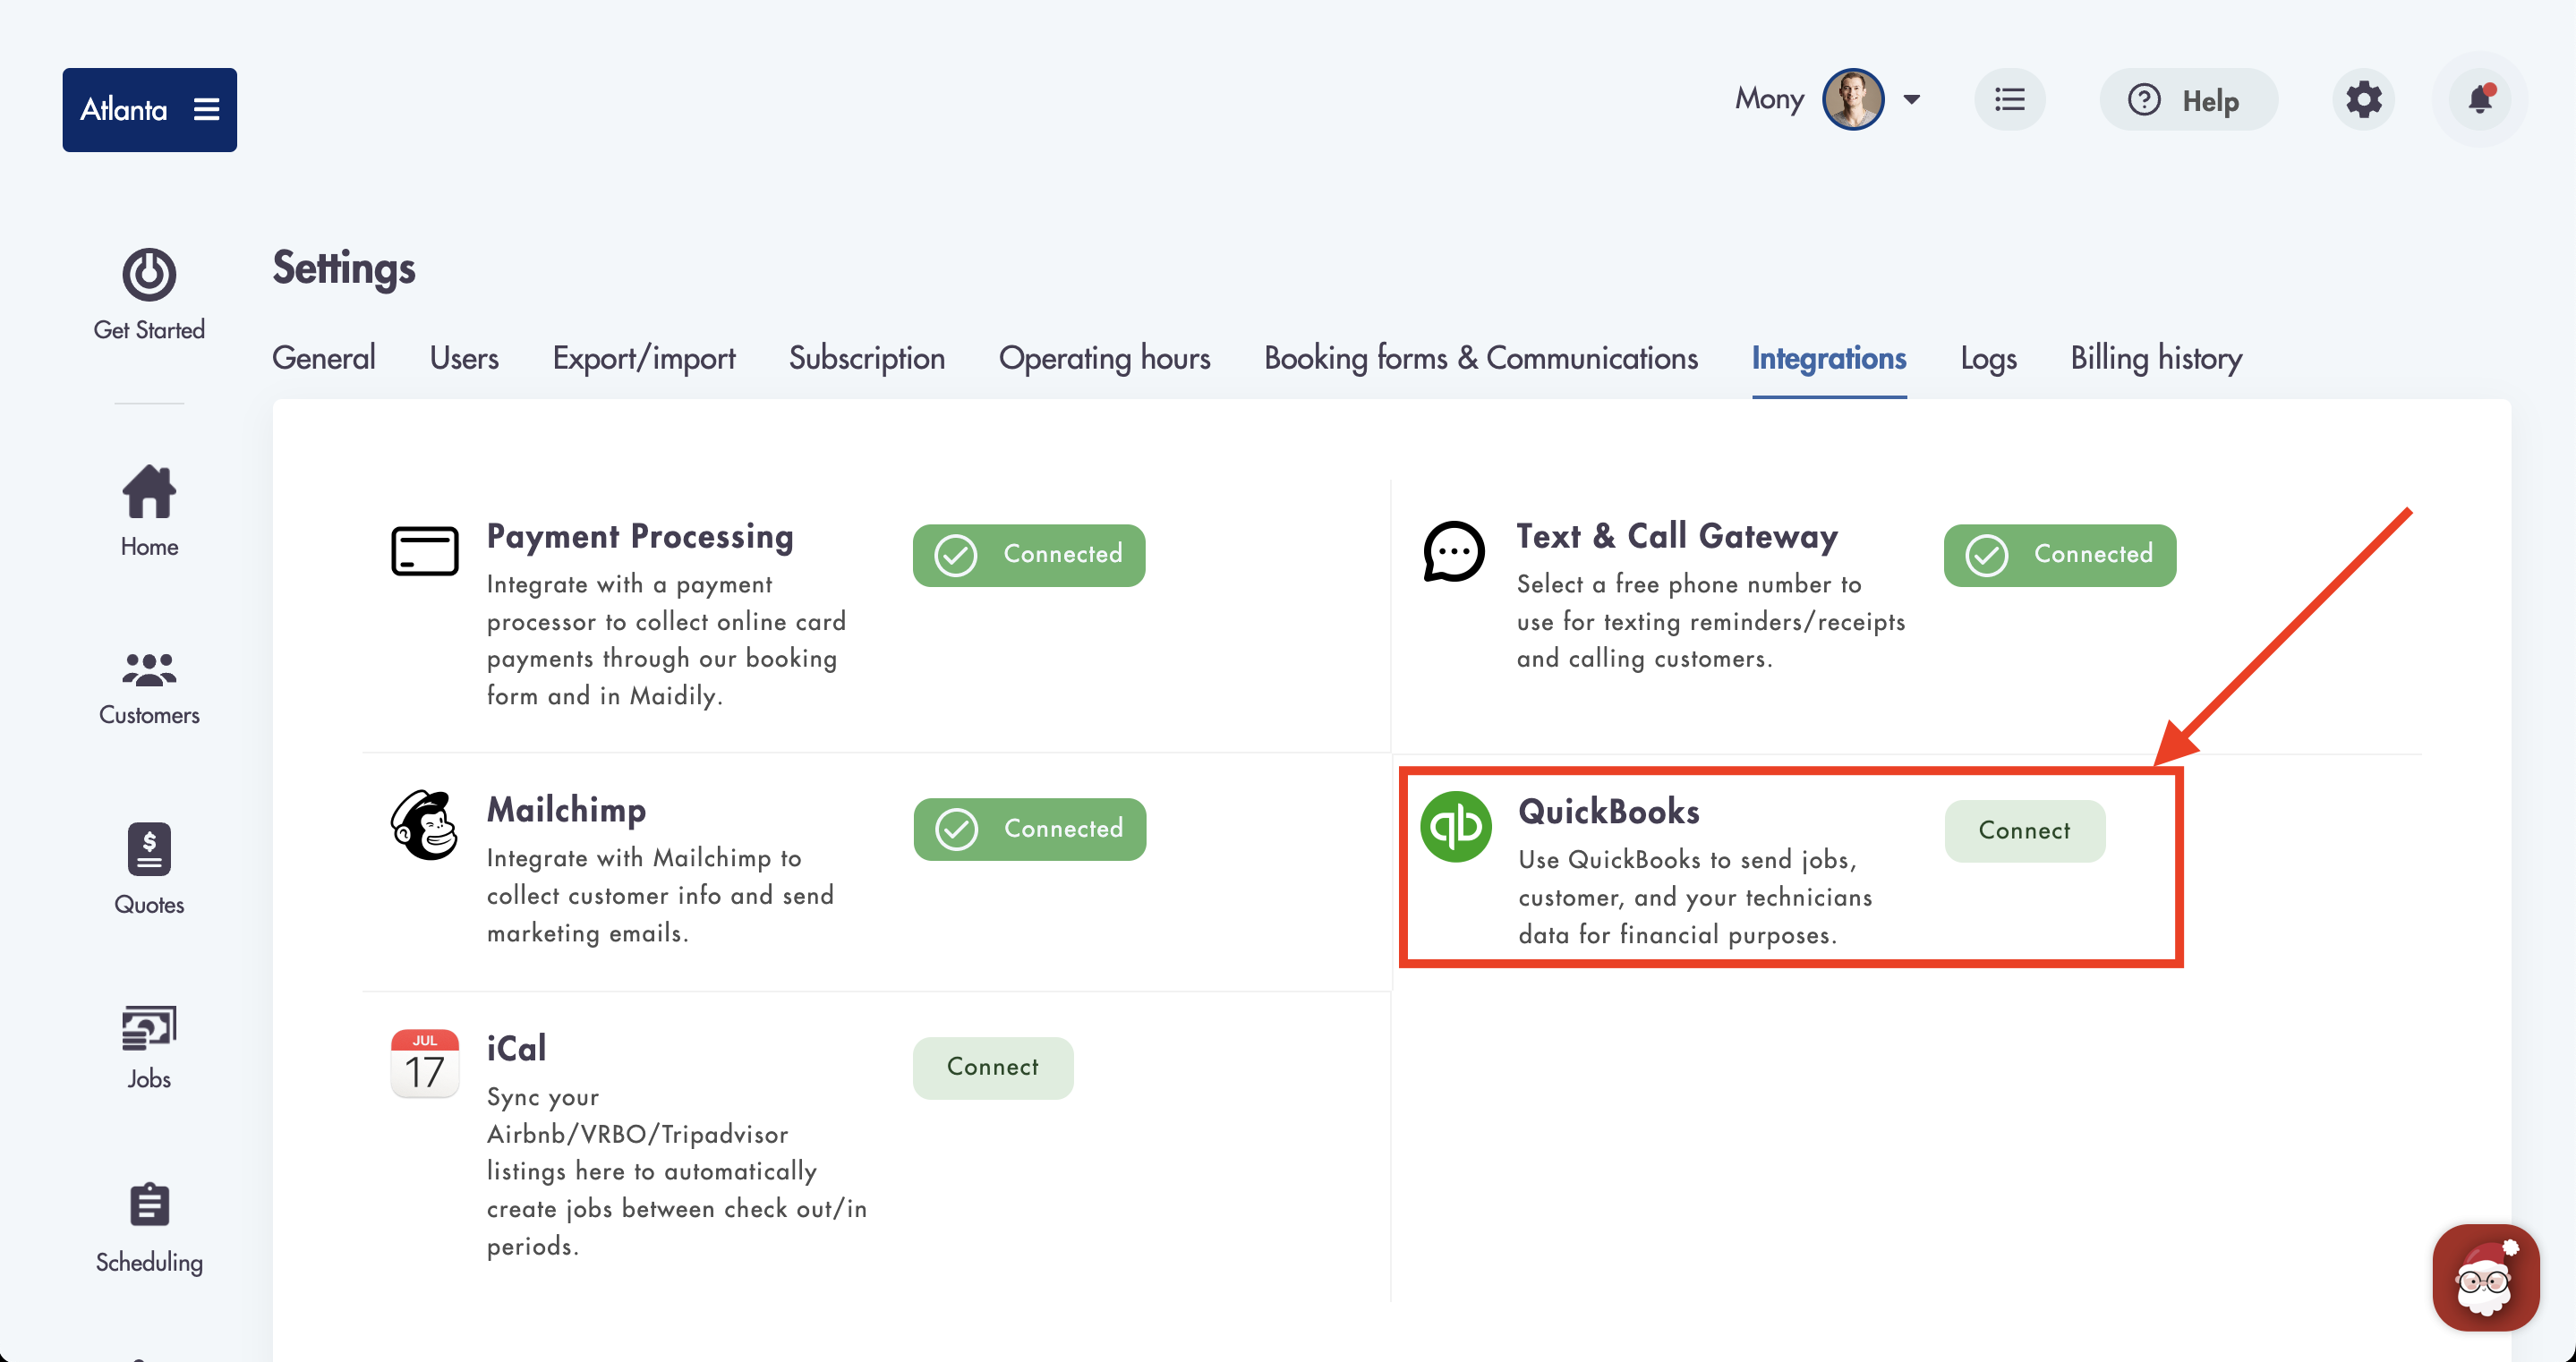
Here is how to integrate QuickBooks:
- Go to Settings -> Integrations -> QuickBooks
- Click on 'Connect'
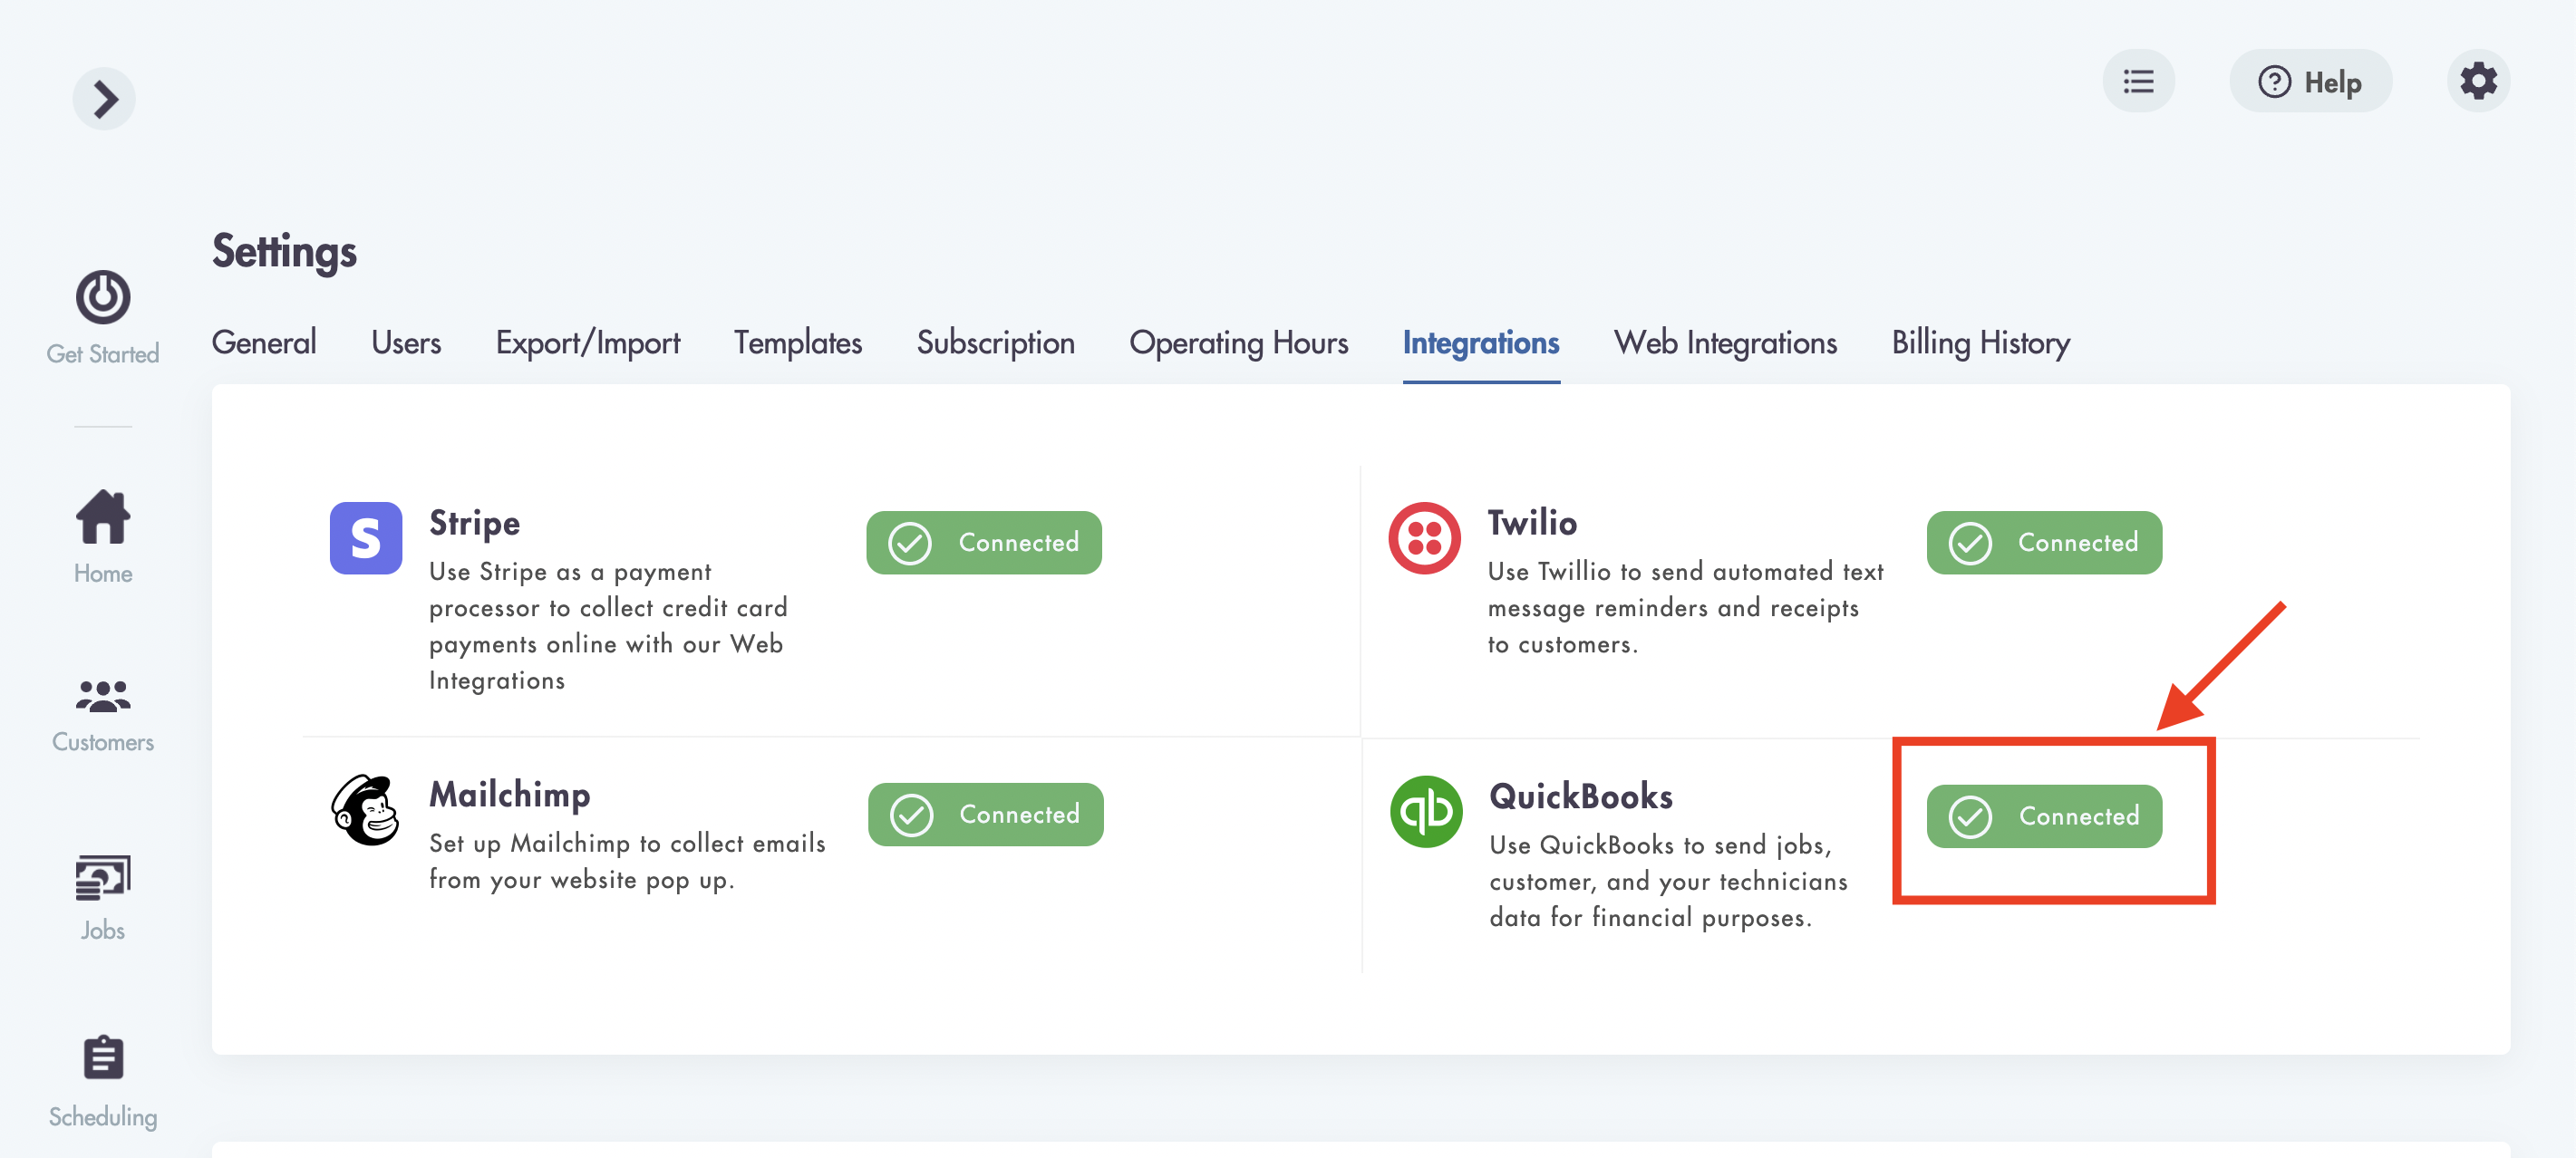
- Click on 'Connect to QuickBooks'

- Sign into your QuickBooks Online account

- Return back to Maidily and you will see a 'Connected' status
- To see what fields will be synched with QuickBooks by clicking into the QuickBooks
Fields that have a red asterisks (*) next to them are REQUIRED to exist in your QuickBook account
Please allow up to 24 hours for the sync to fully process all data between Maidily and QuickBooks
Considerations:
-
You can not edit the fields for either Maidily or QuickBooks
-
Only the displaying fields will transfer over to your QuickBooks
-
Data is synced immediately upon customer/job creation
-
Fields that are not required with no data will not sync
Relevant articles:
Have any questions? Need help with your QuickBooks integration: