You can create Zaps that connect Maidily with other apps in order to create powerful automated workflows that can help your business.
To create automated workflows, or Zaps, you MUST have a Zapier account that is linked to Maidily
You can create a Zap directly from Zapier by logging in or from within Maidily (Settings -> Integrations -> Zapier)
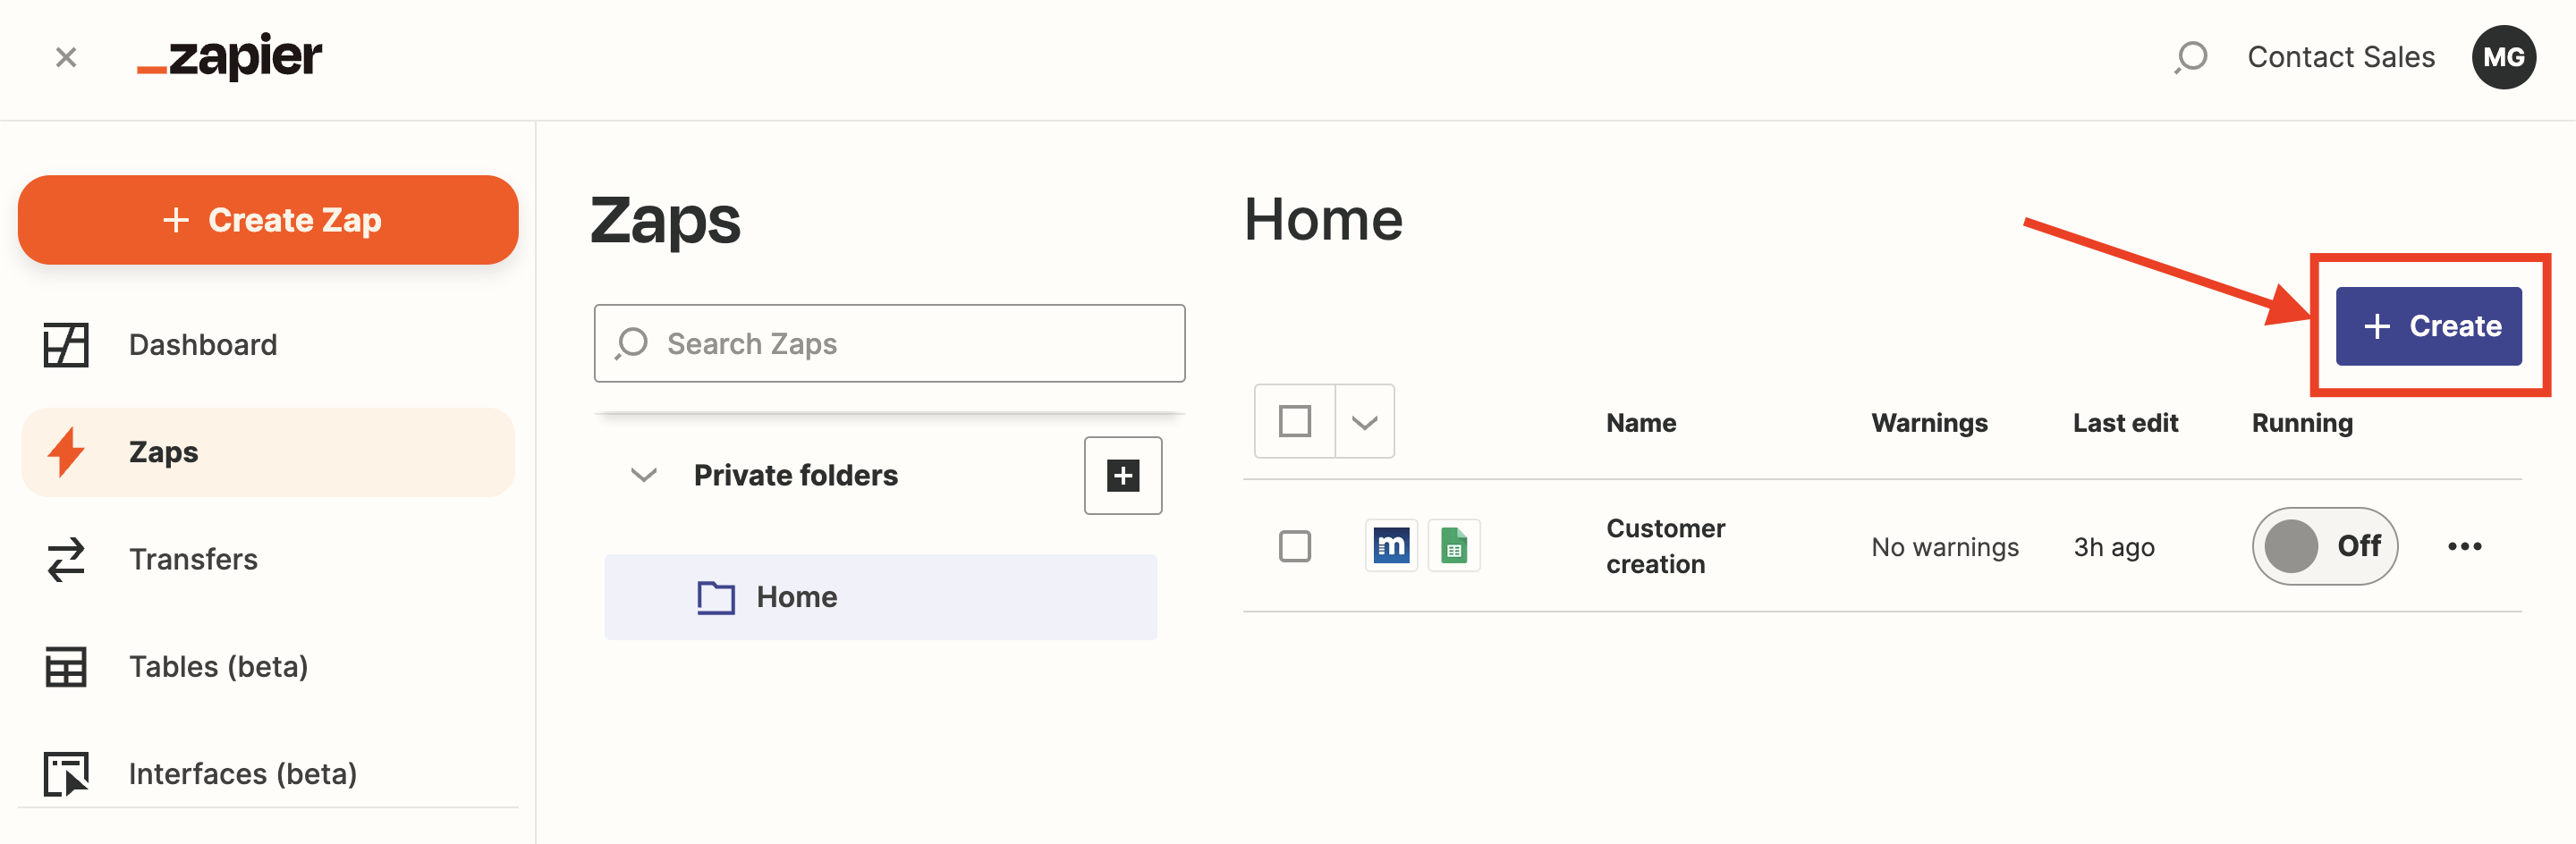
From Zapier:
- Click on Zaps

- Click on 'Create'
From Maidily:
- Settings -> Integrations -> Zapier
- Click 'Connect'
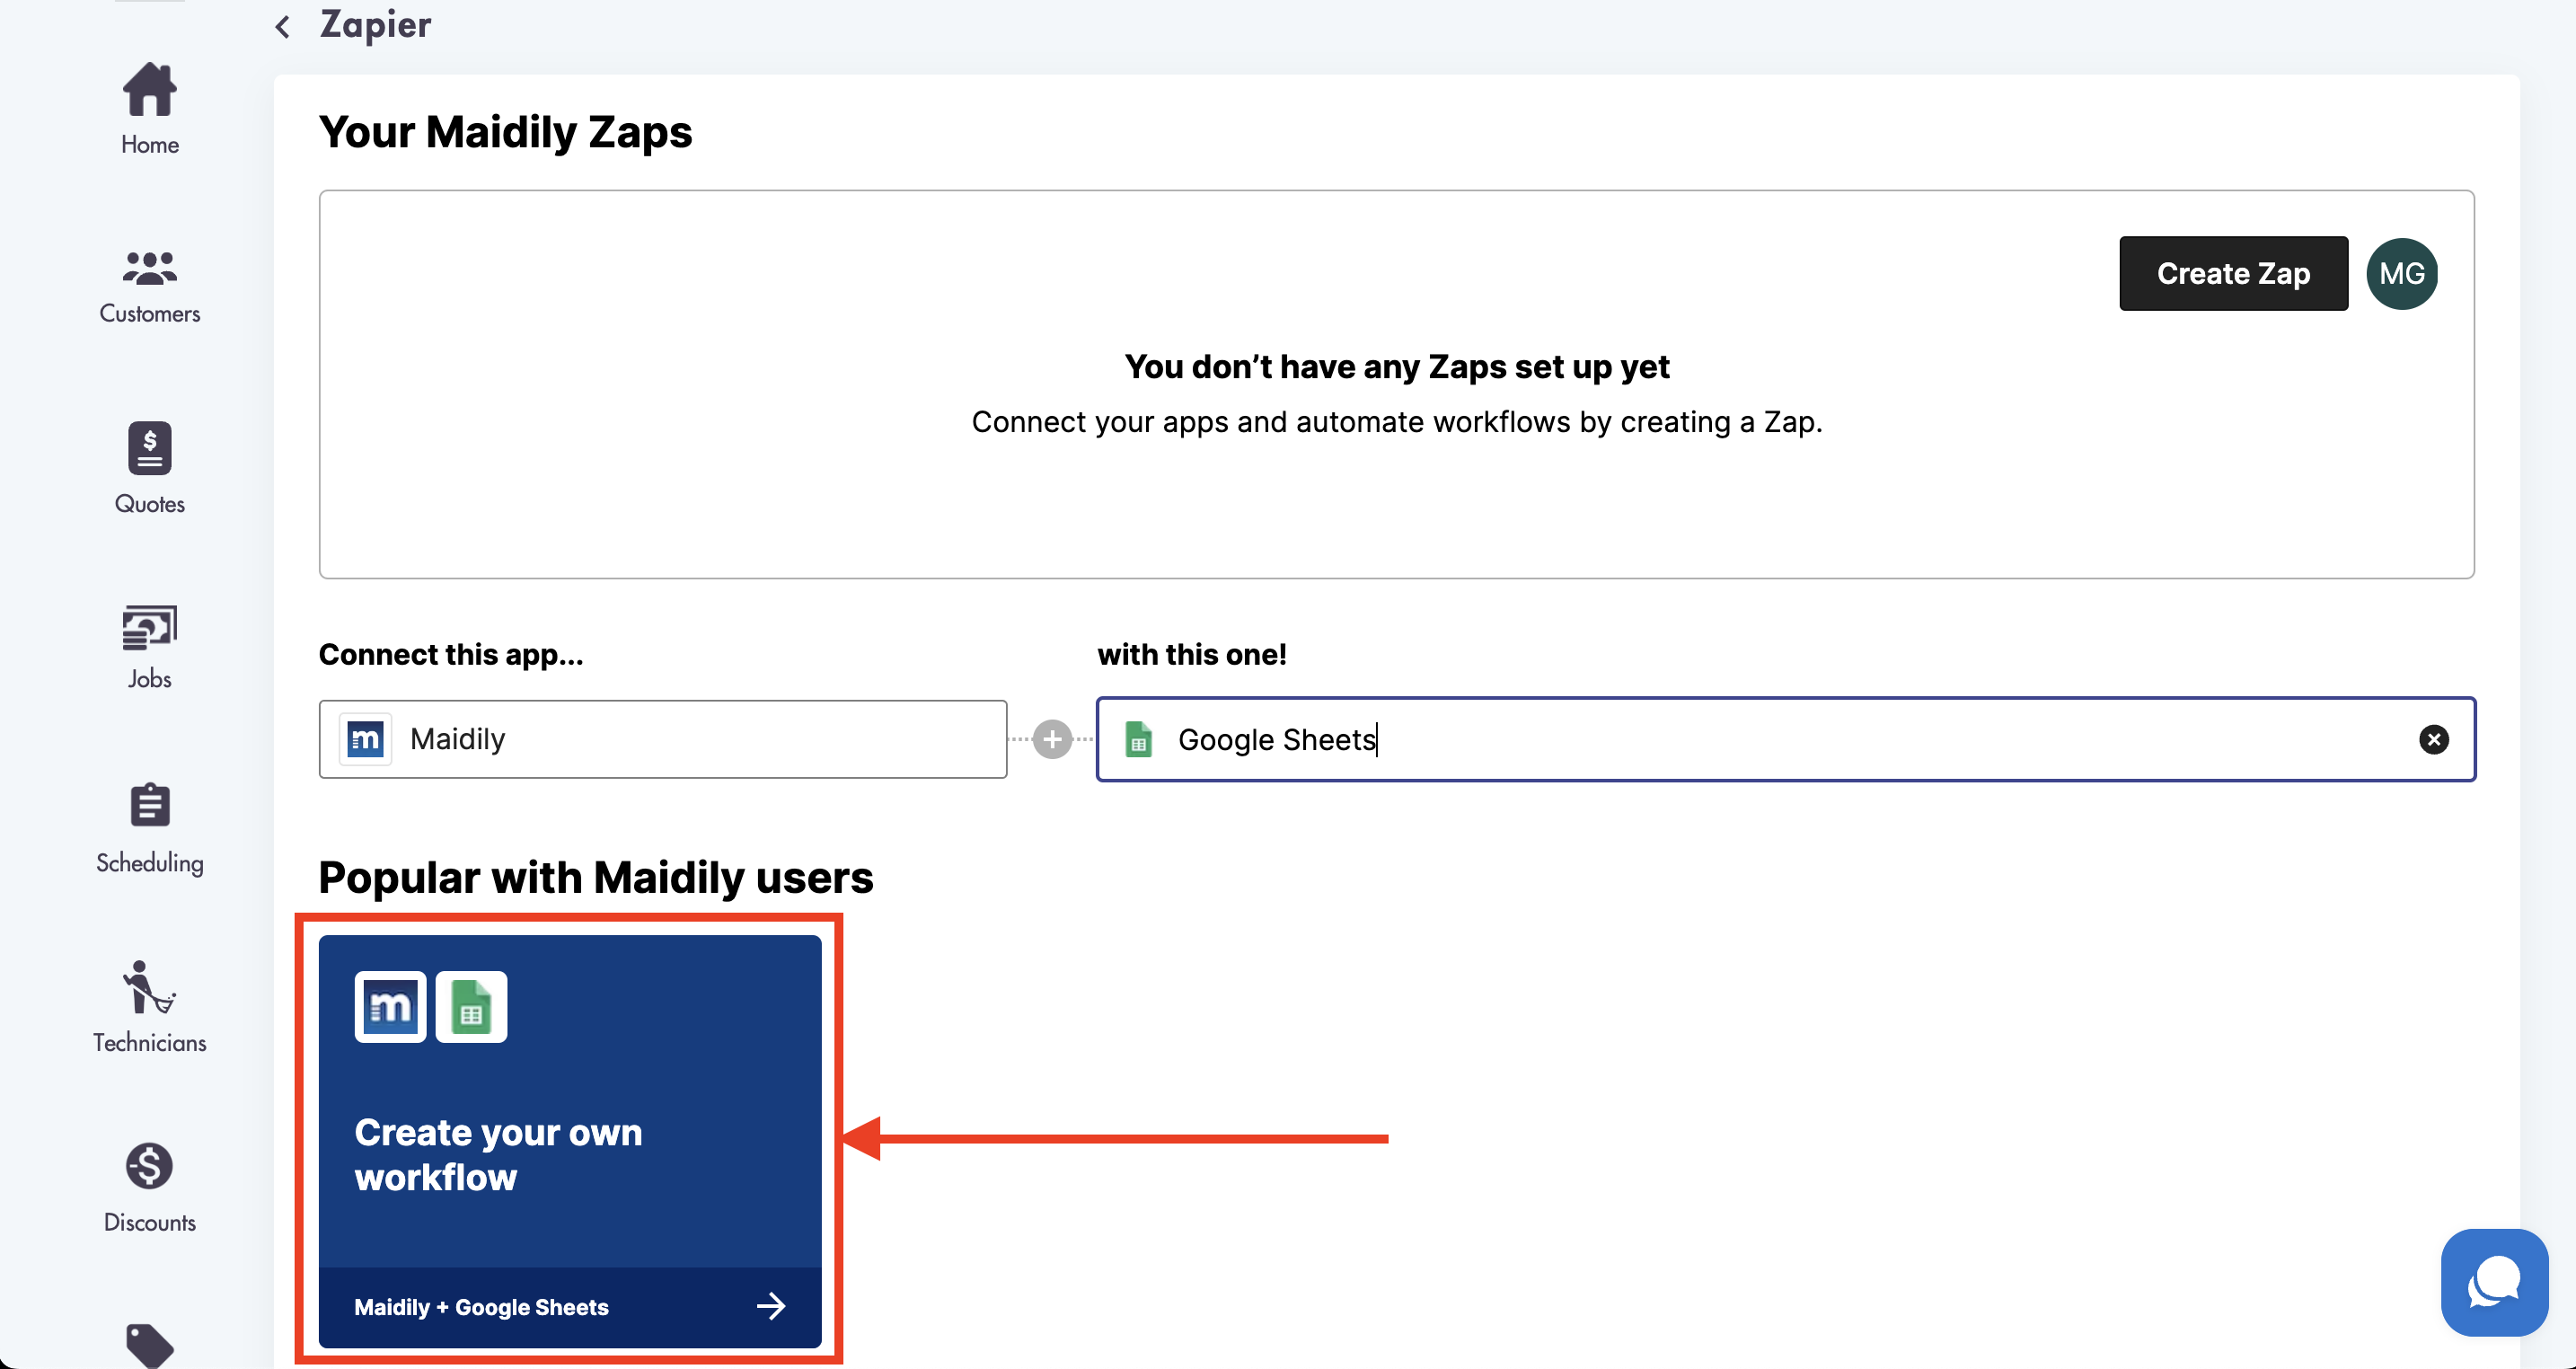
- Select your app
- Click on 'Create your own workflow'
- Follow the steps for creating a Zap
How to create Zaps in Zapier:
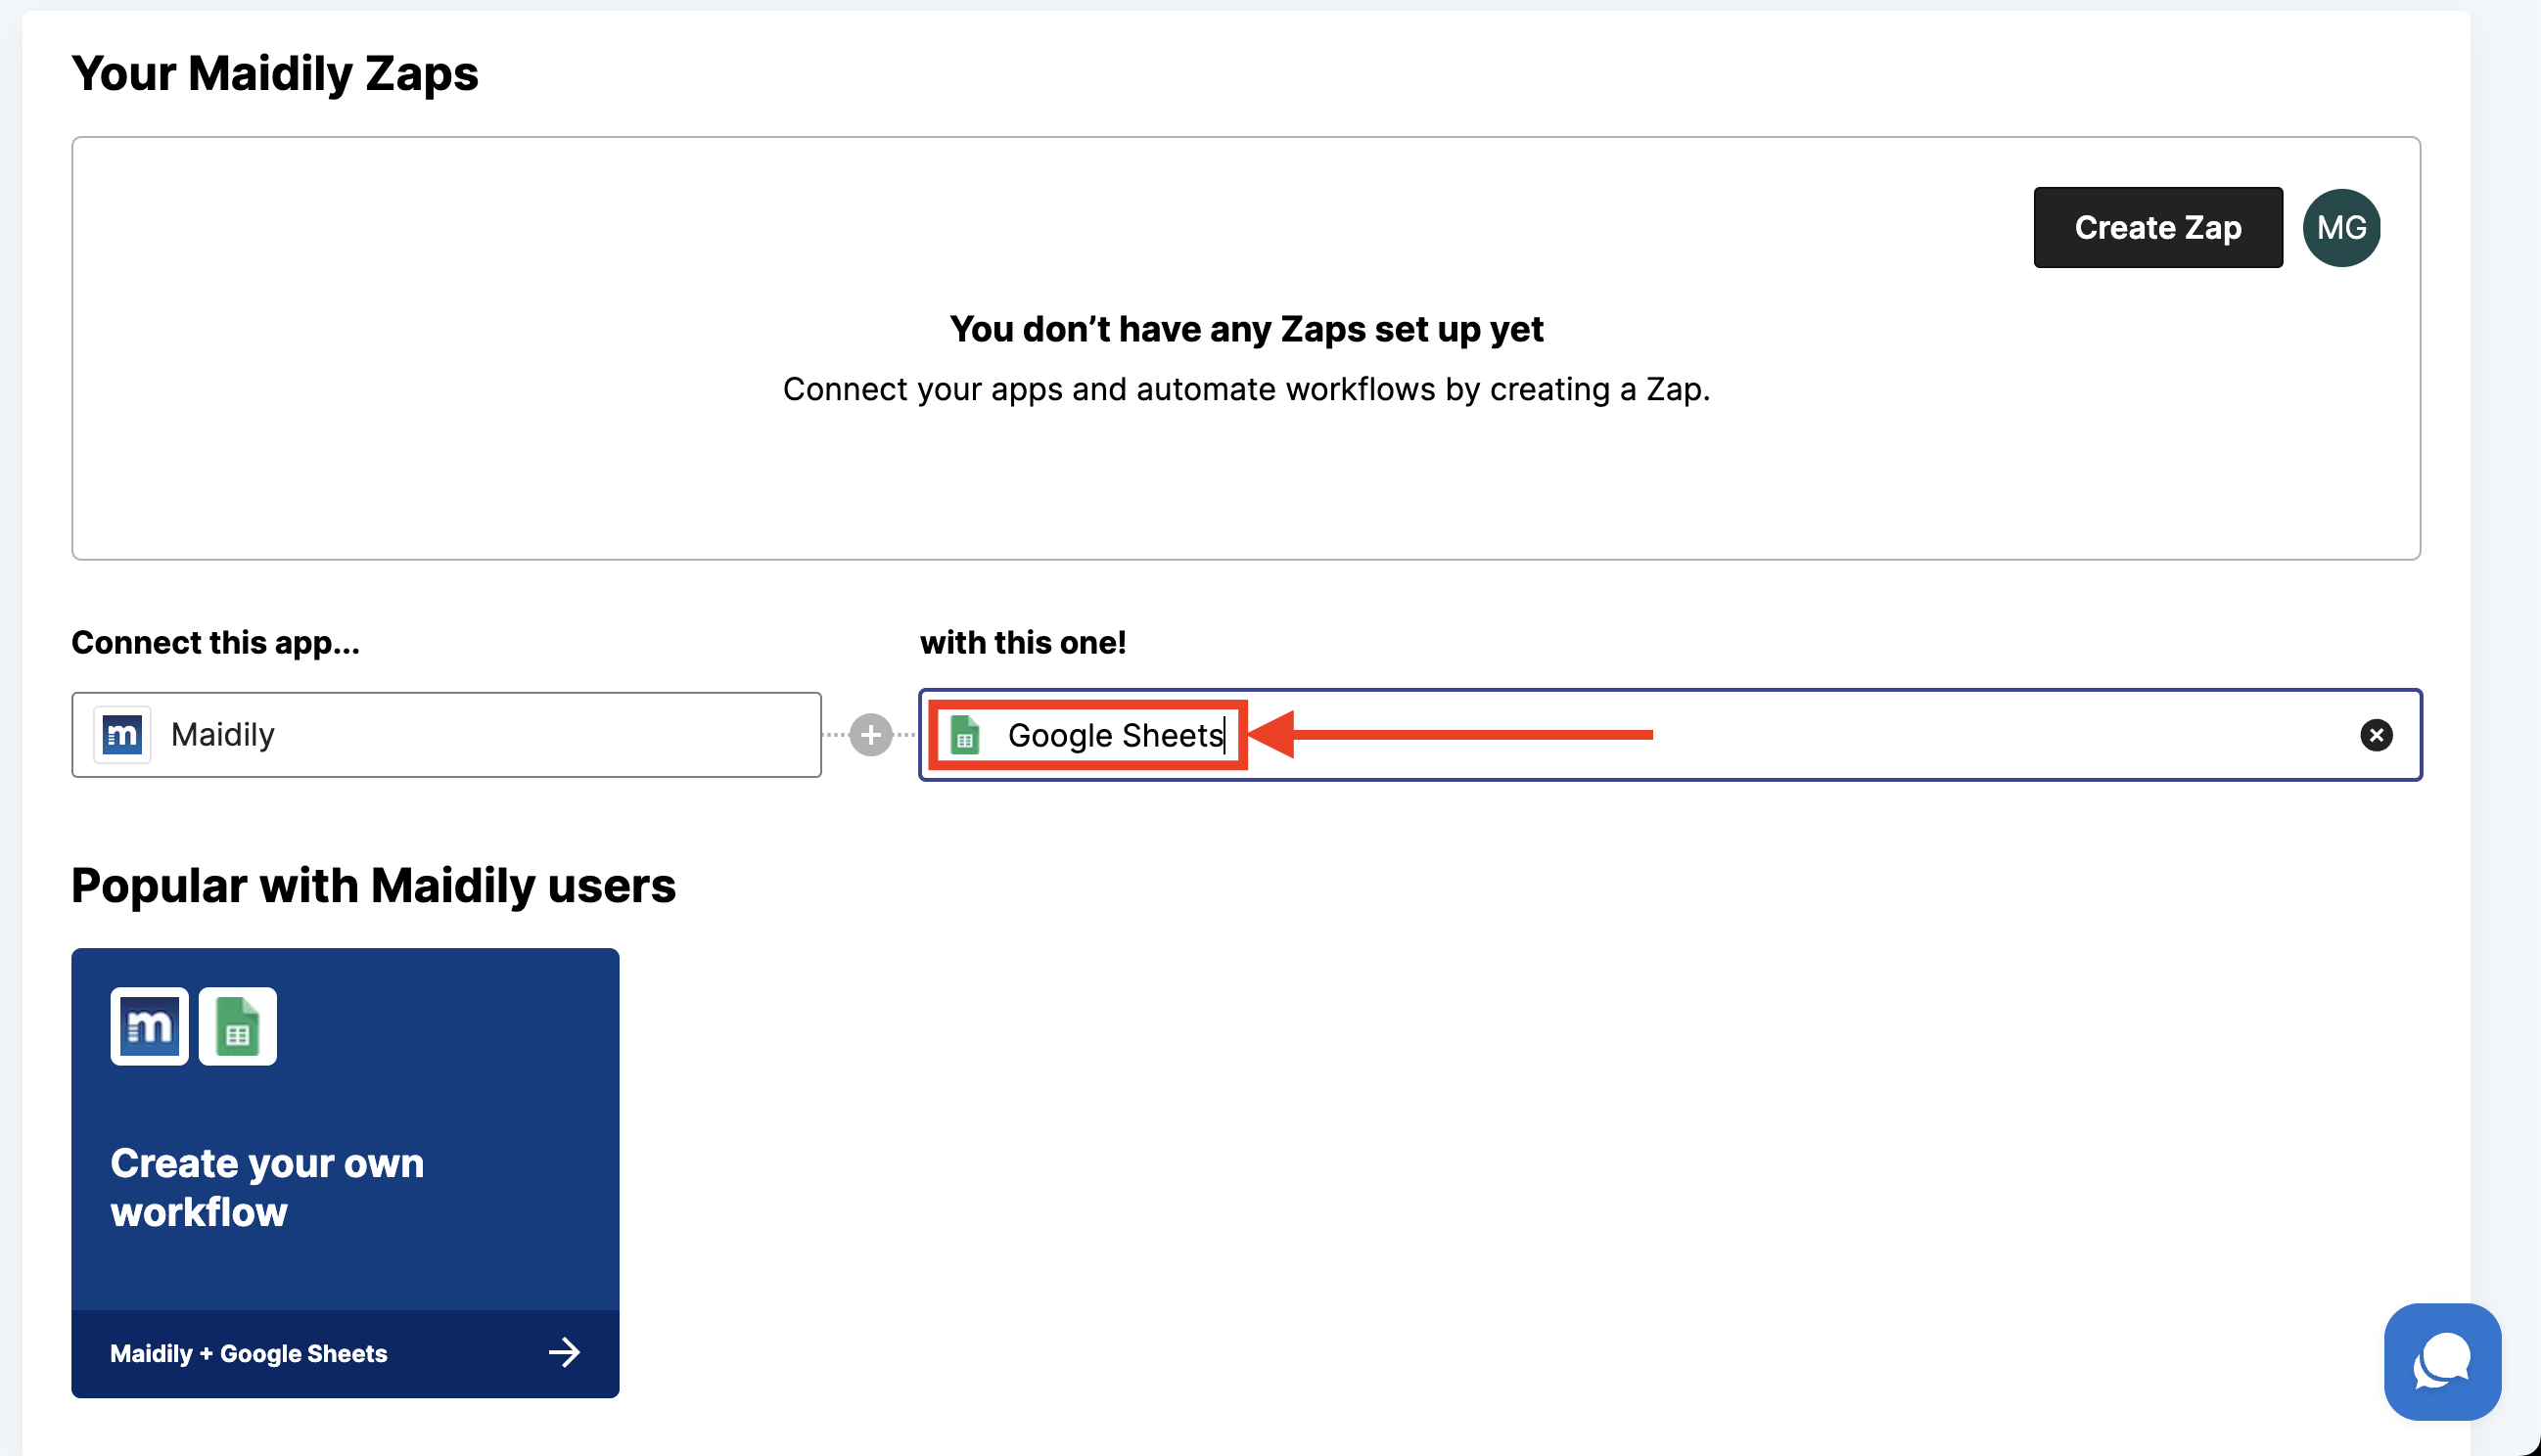
What we will show as an example of how to set up a Zap is to connect Maidily to Google Sheets through Zapier so that every time a new customer is created in Maidily they are also automatically created in Google Sheets.
- First you must select Maidily as the app for a trigger

- Next choose an event, that is going to be the 'trigger'
- We have 18 event triggers to choose from
- New Customer - Triggers when a new customer is created.
- Customer Deletion - Triggers when a customer is deleted.
- New Tech - Triggers when a new technician is created.
- Time Off Requests - Triggers when a new time off request is created.
- Tech Deletion - Triggers when the technician is removed/deleted.
- New Job - Triggers when a new job is created.
- Job Deletion - Triggers when the job is deleted.
- Job Cancelation - Triggers when a job is getting canceled.
- Subscription Cancelation - Triggers when a job subscription is canceled.
- Paid Job - Triggers when a job is paid through an invoice/gets charged through the job details.
- Job Assignment - Triggers when a job is assigned to a technician or team.
- Job Update - Triggers when the job details of a job are updated.
- New Quote - Triggers when a new quote is created.
- Quote Deletion - Triggers when a quote is deleted.
- Quote Update - Triggers when the quote details of a quote are updated.
- Quote Expired - Triggers when a quote has expired
- Quote Rejected - Triggers when the quote is rejected.
- Quote Accepted - Triggers when the quote is accepted.

- An example of an event would be a 'New Customer'
- This event will trigger an action based on new customers being created in Maidily

- Click 'Continue'
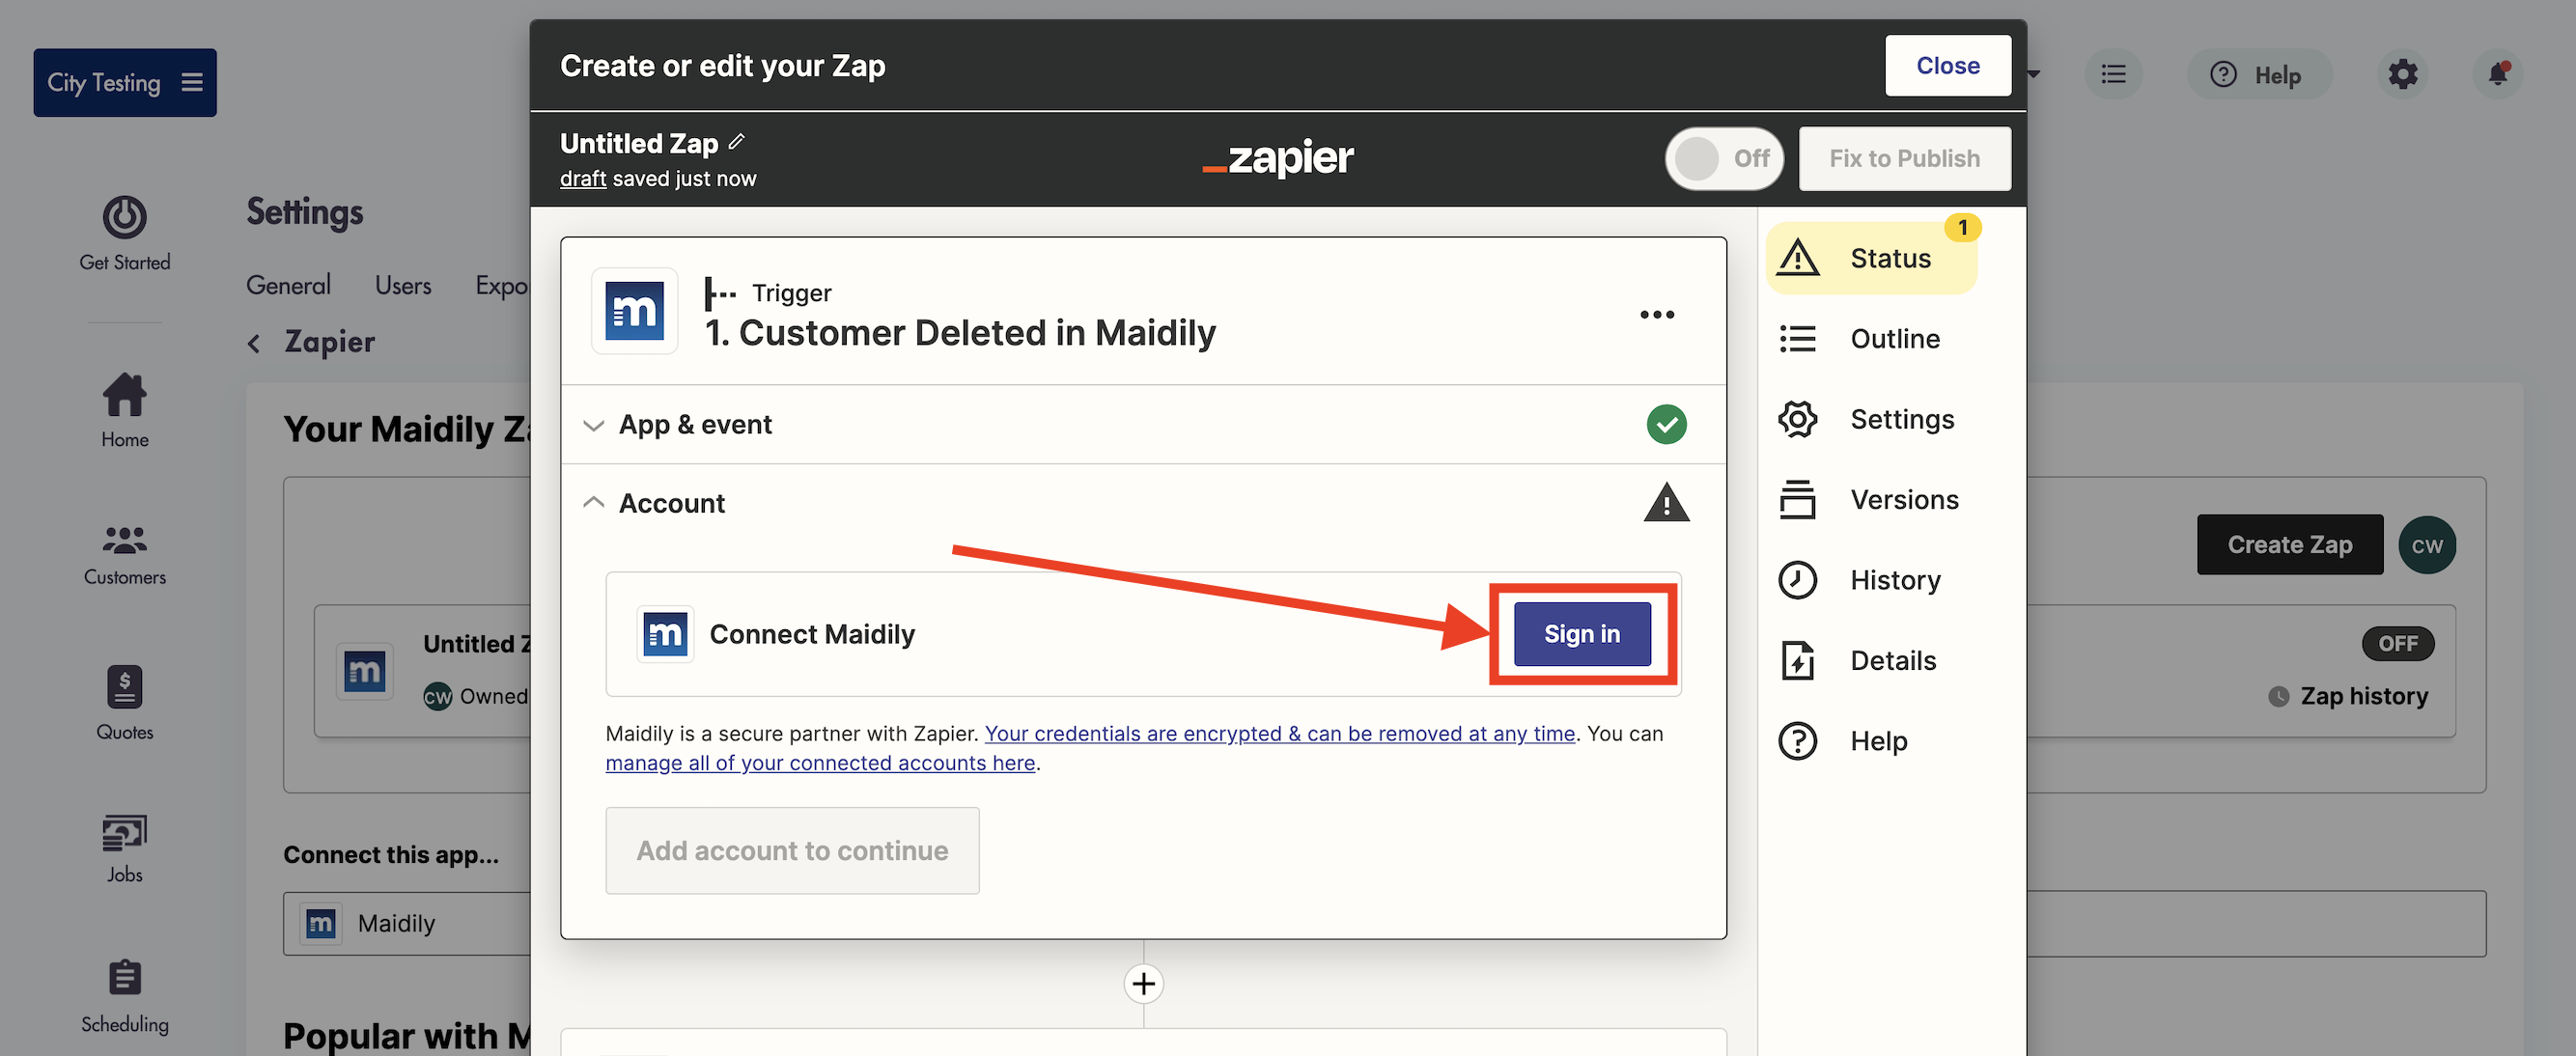
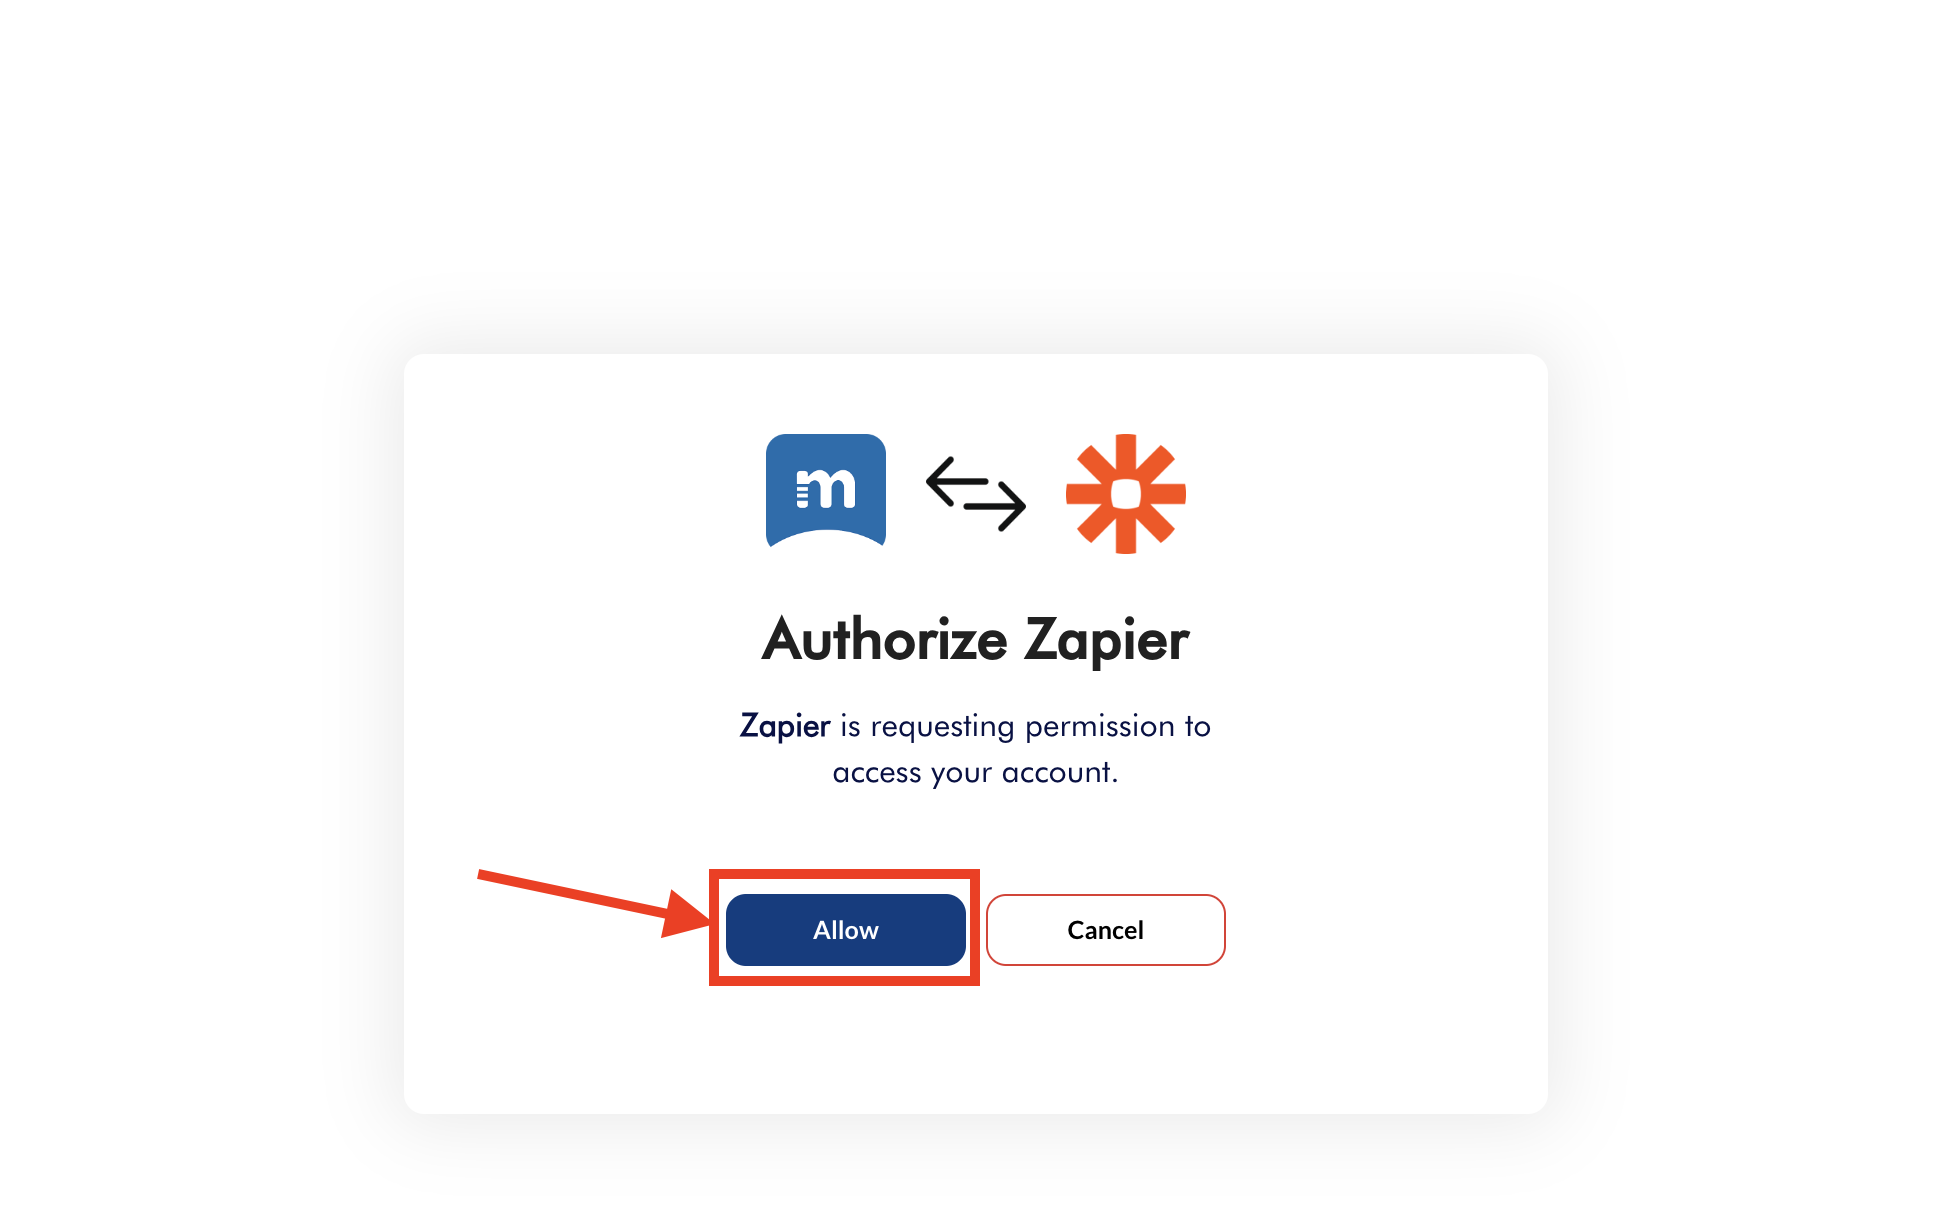
- Click 'Continue' in the Account tab as well (you only need to sign into Maidily once)
- If you are not signed into Maidily this is the step where you would sign into your Maidily to connect Zapier
- Allow notifications from Zapier
- Next you will have to test your Zap (to make sure Maidily and Zapier are connected)
- Click on 'Test trigger'
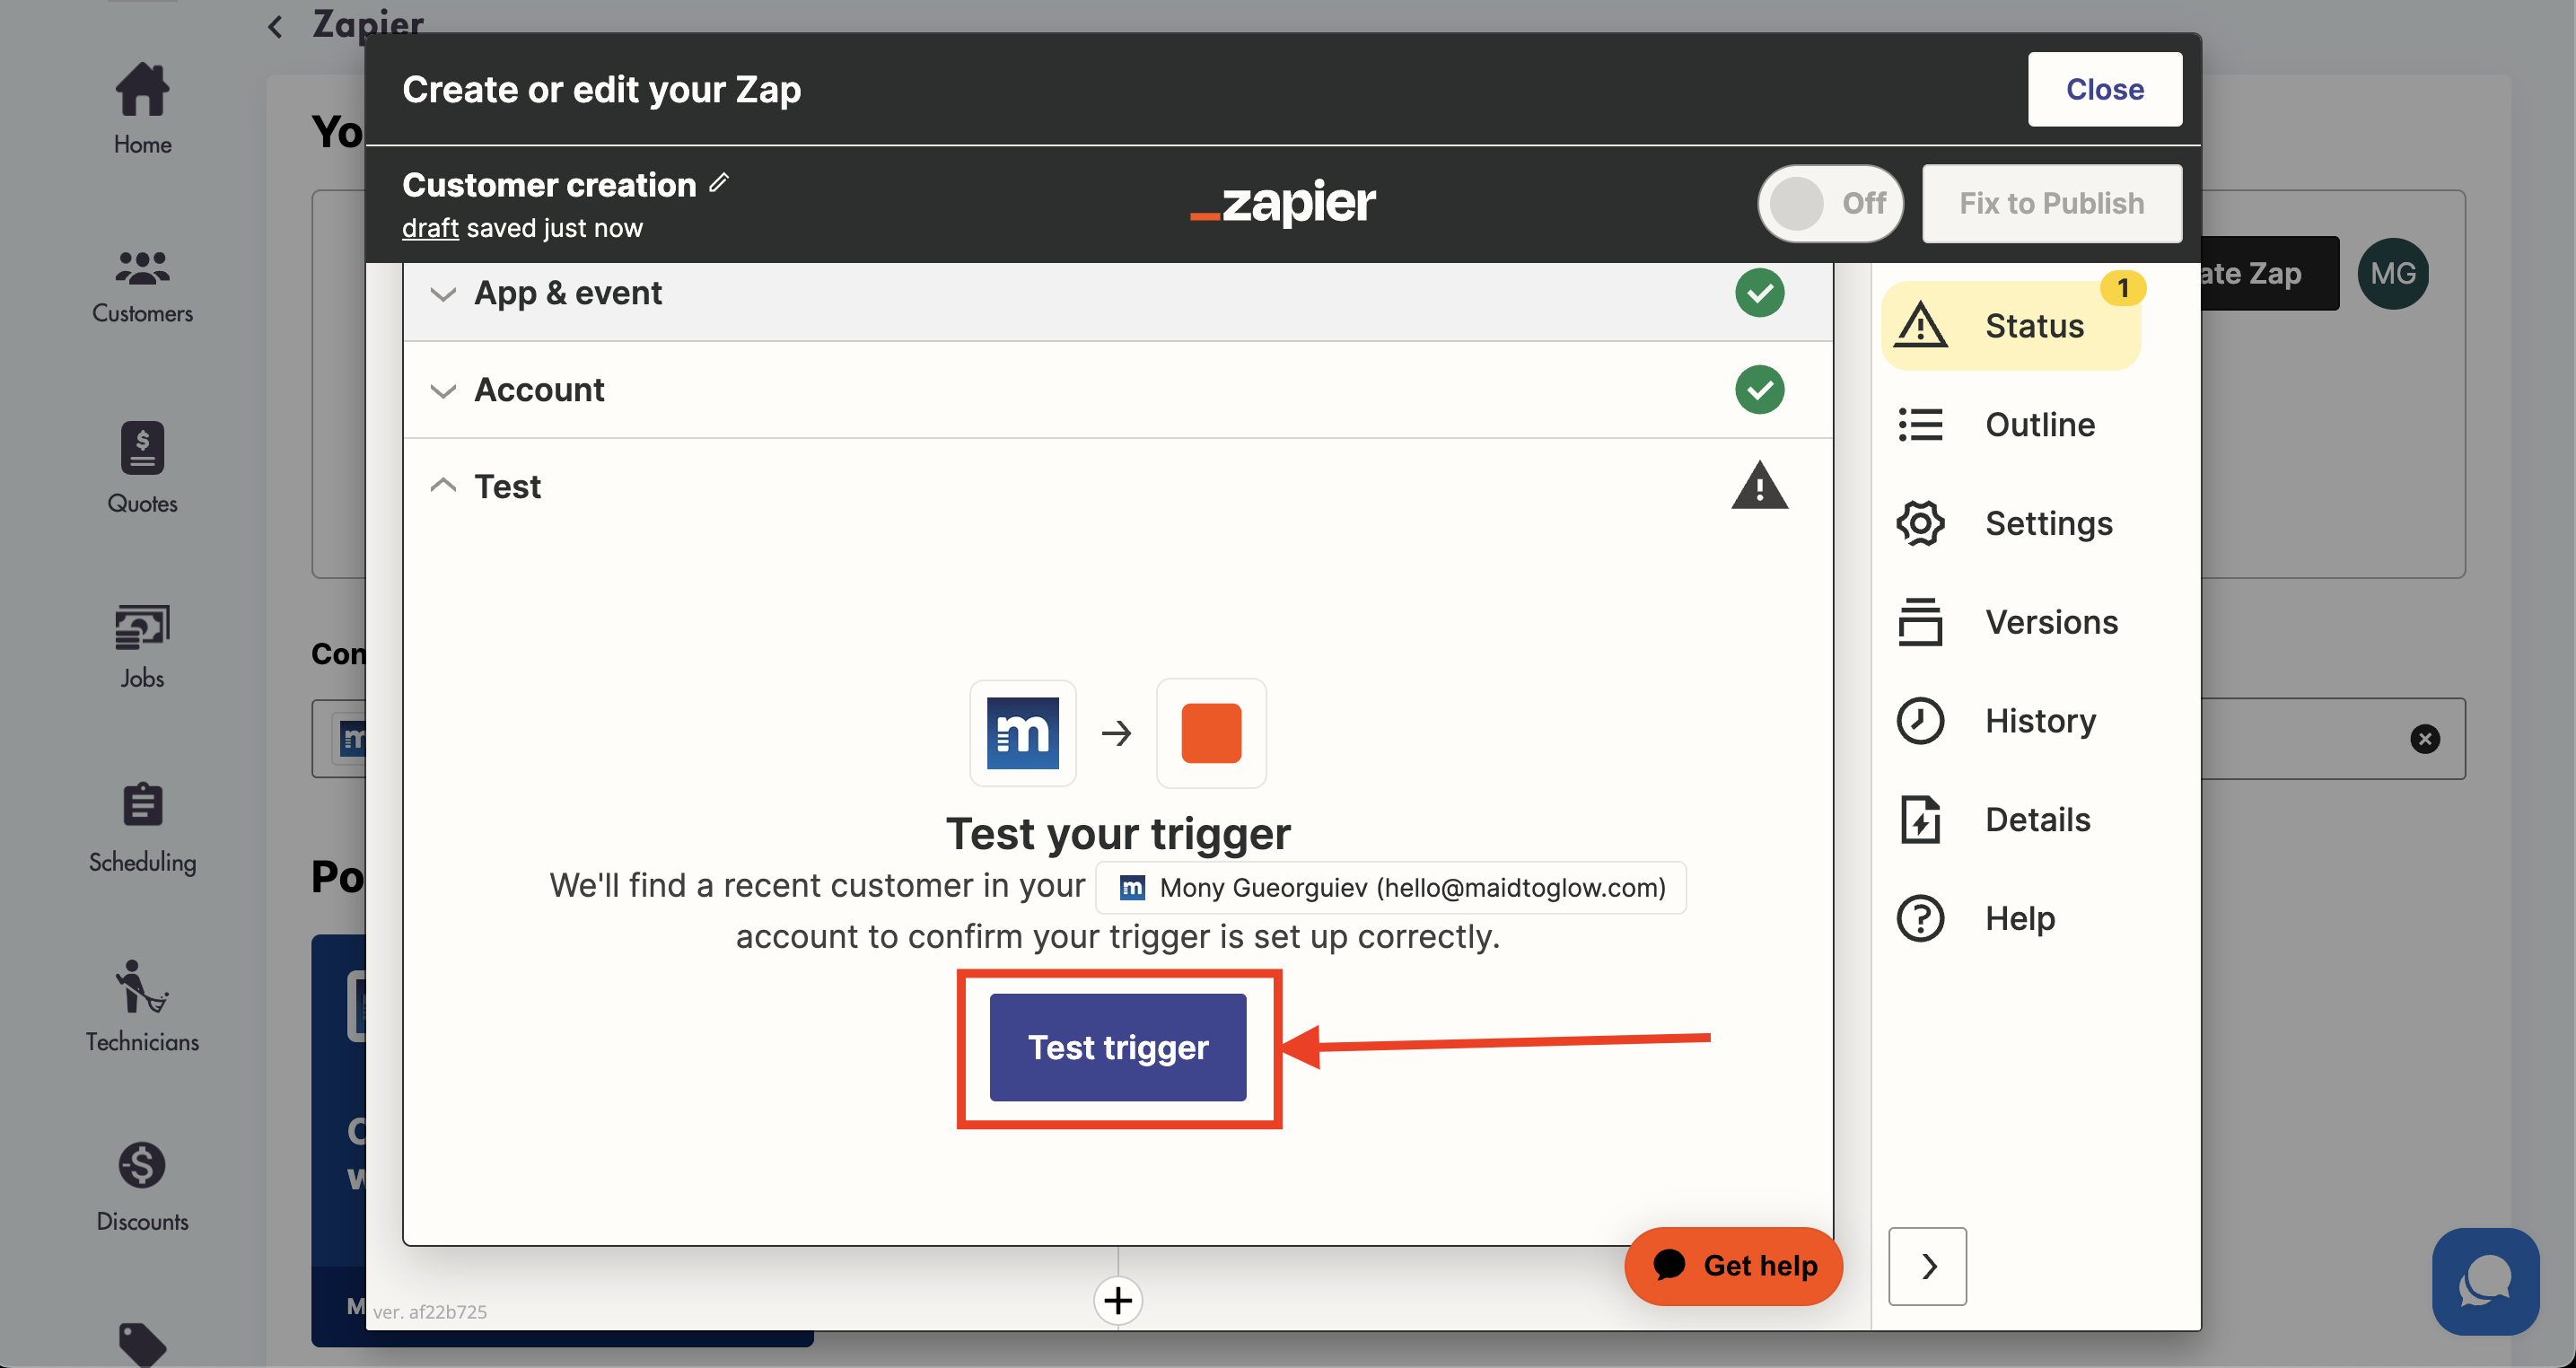
- Zapier will provide test data sample that it will use for the test
- If no test data is selected by Zapier when you press 'Test trigger' you will need to create a test in your Maidily account directly and come back to this screen and try again. For example if you are creating a trigger for new customers you will need to create a new (test) customer in Maidily and come back to this screen so the test data can pull up

- Click on 'Continue with selected record' when ready to continue
- Next you will select the app where you want the action to take place

- We will choose Google Sheets for this example
- Next you will have to choose an event for the action
Event choices on Zapier for other apps are defined by the app company itself and not Maidily
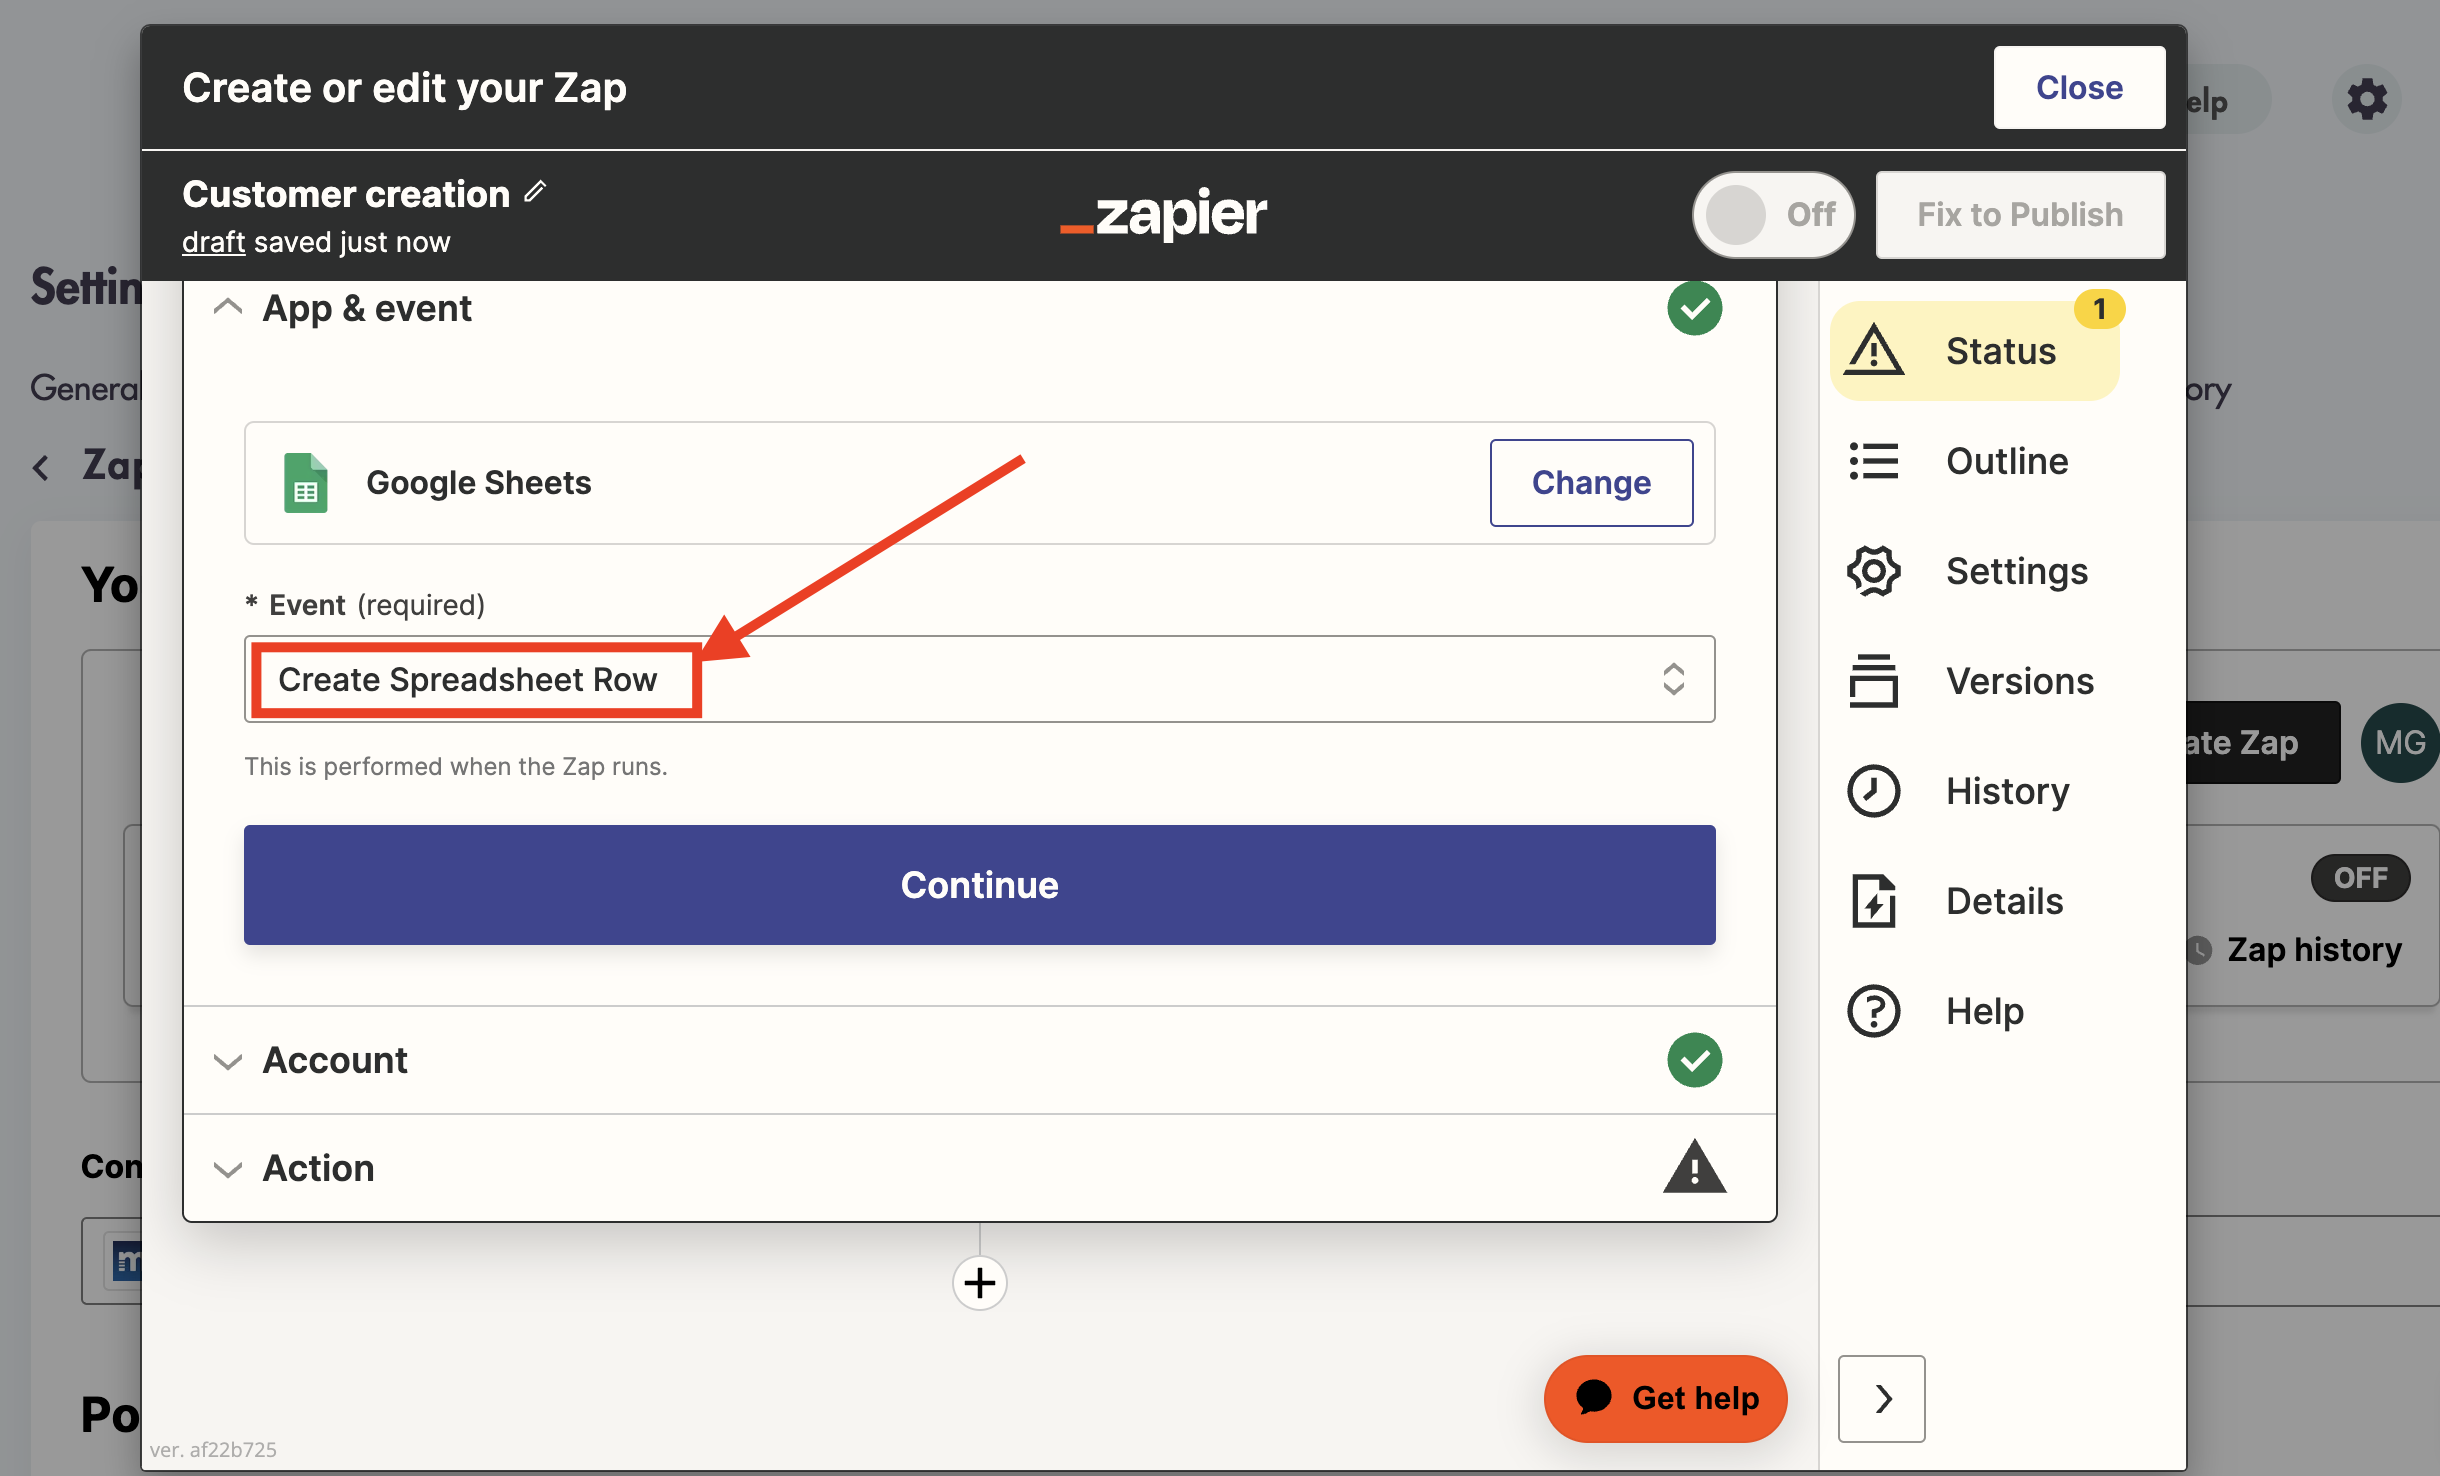
- We selected 'Create Spreadsheet Row' for this example
- You will be prompted to sign into your Google Sheets account/your account for the app you selected for the action

- Once signed in click 'Continue'
- You will now define details of the action that will take place once a trigger happens (a new customer is created in Maidily)
- The action in our example will be for the new customer to be created in Google Sheets
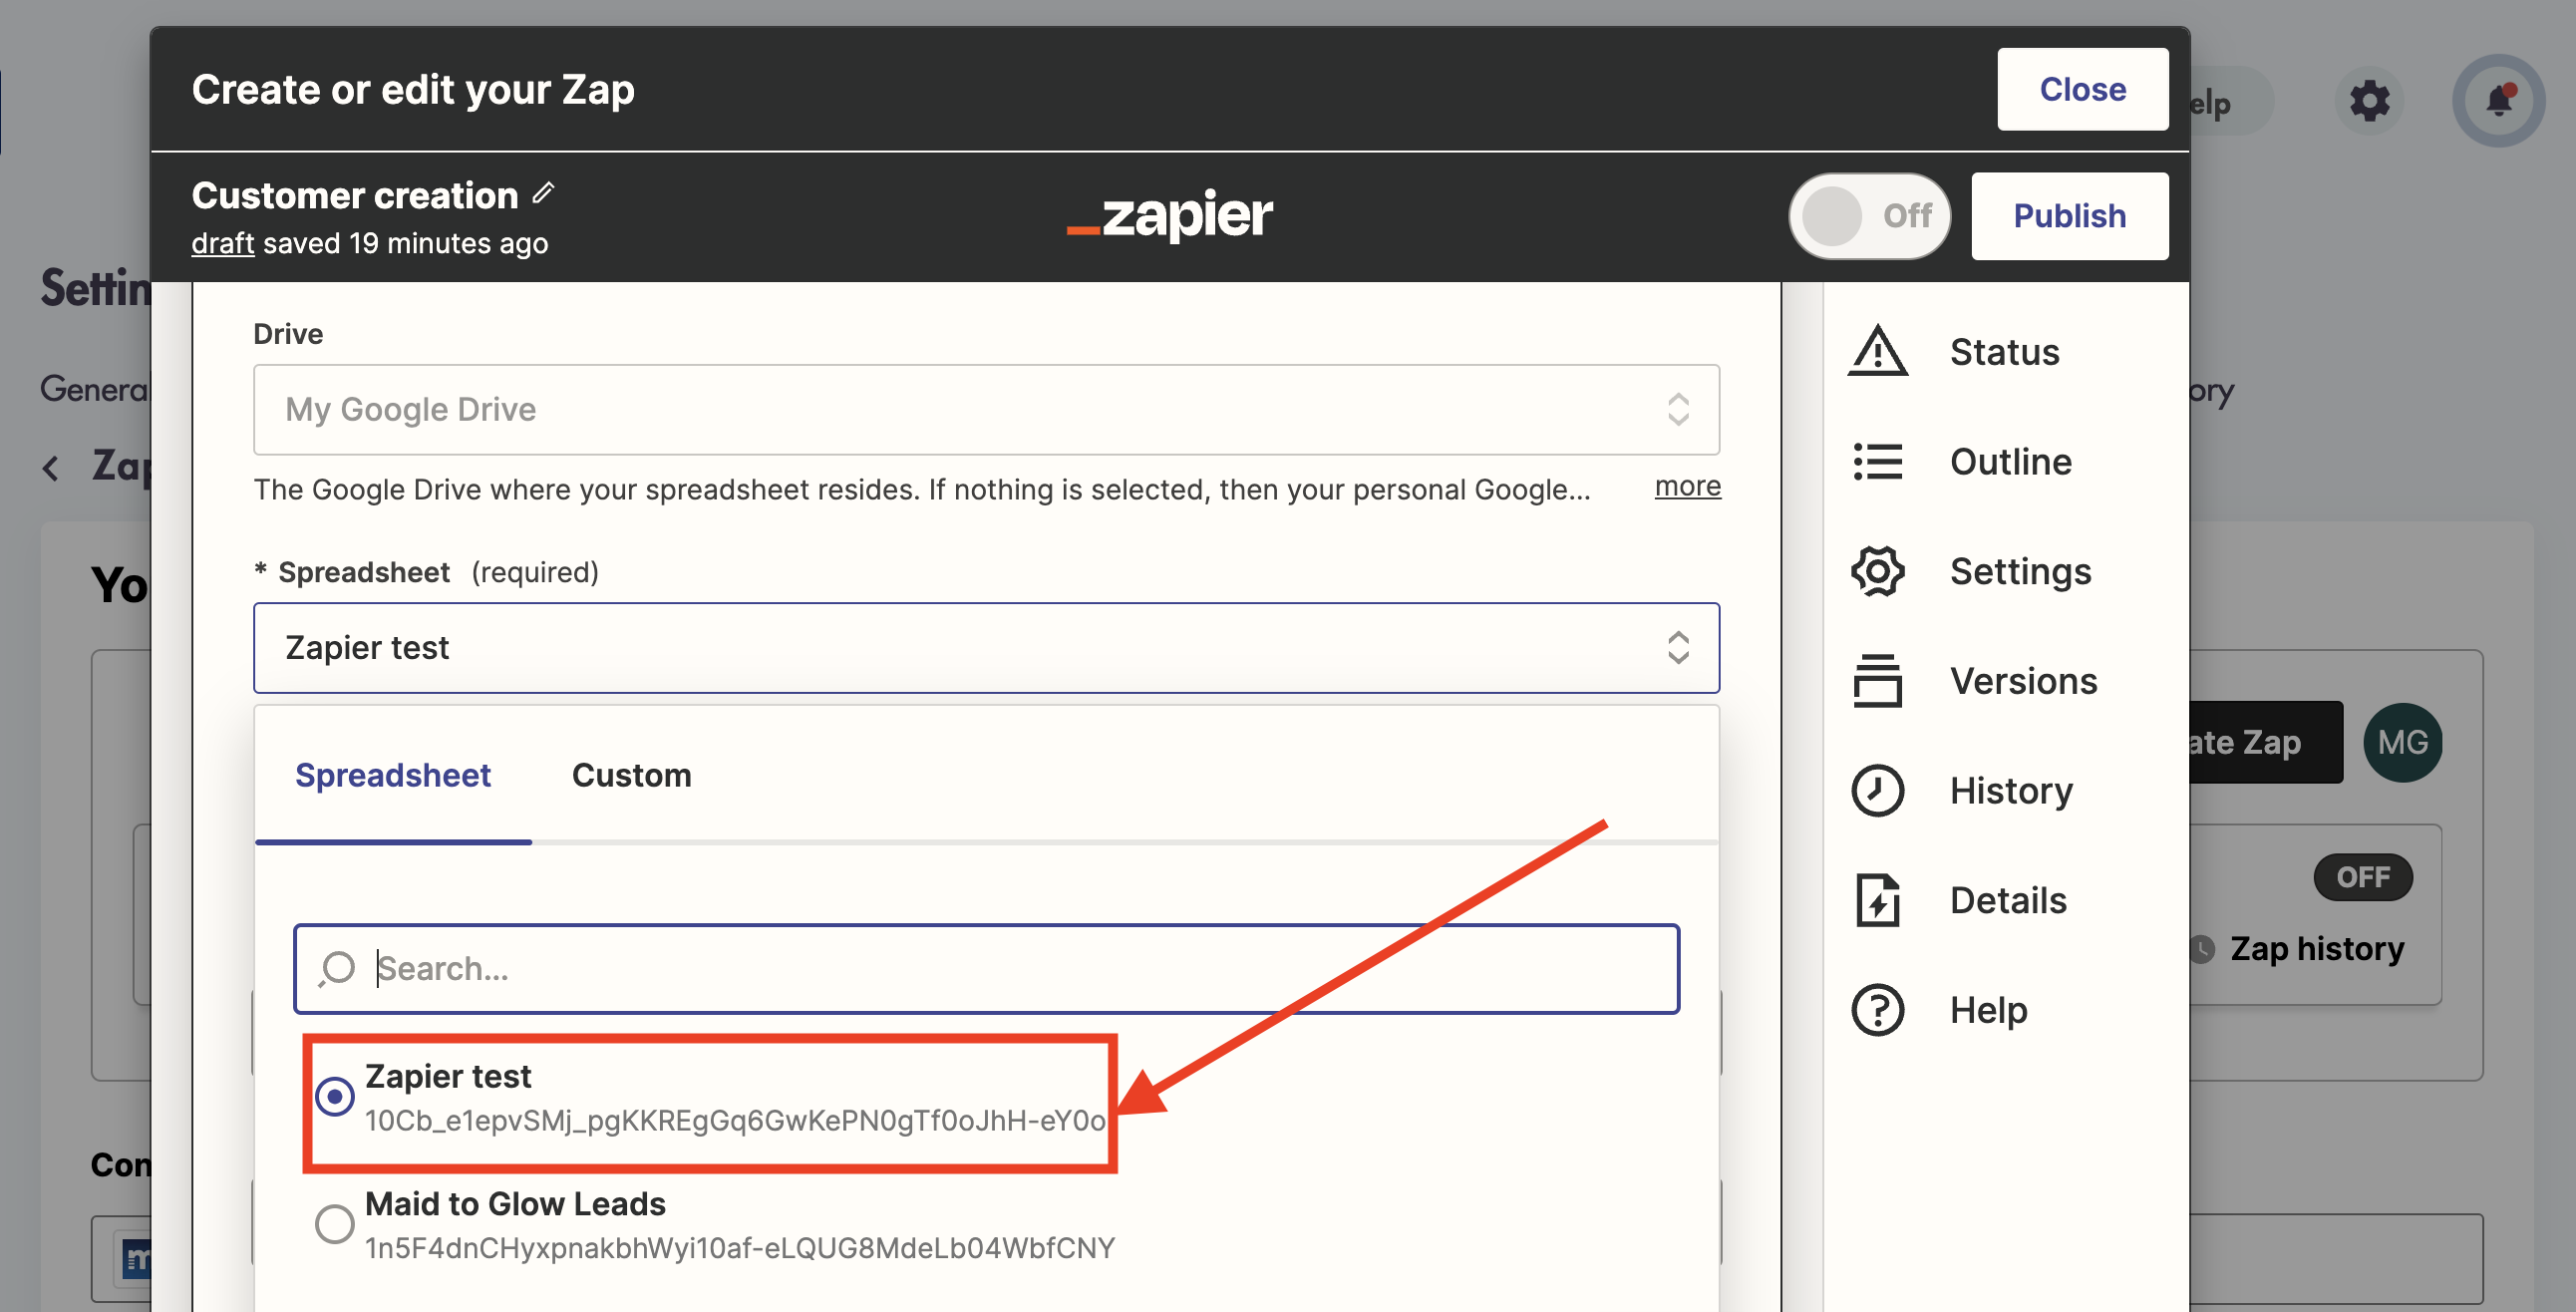
- In the Google Sheet options it's asking us to define where the Google Sheet is, in this case it is in 'My Google Drive'
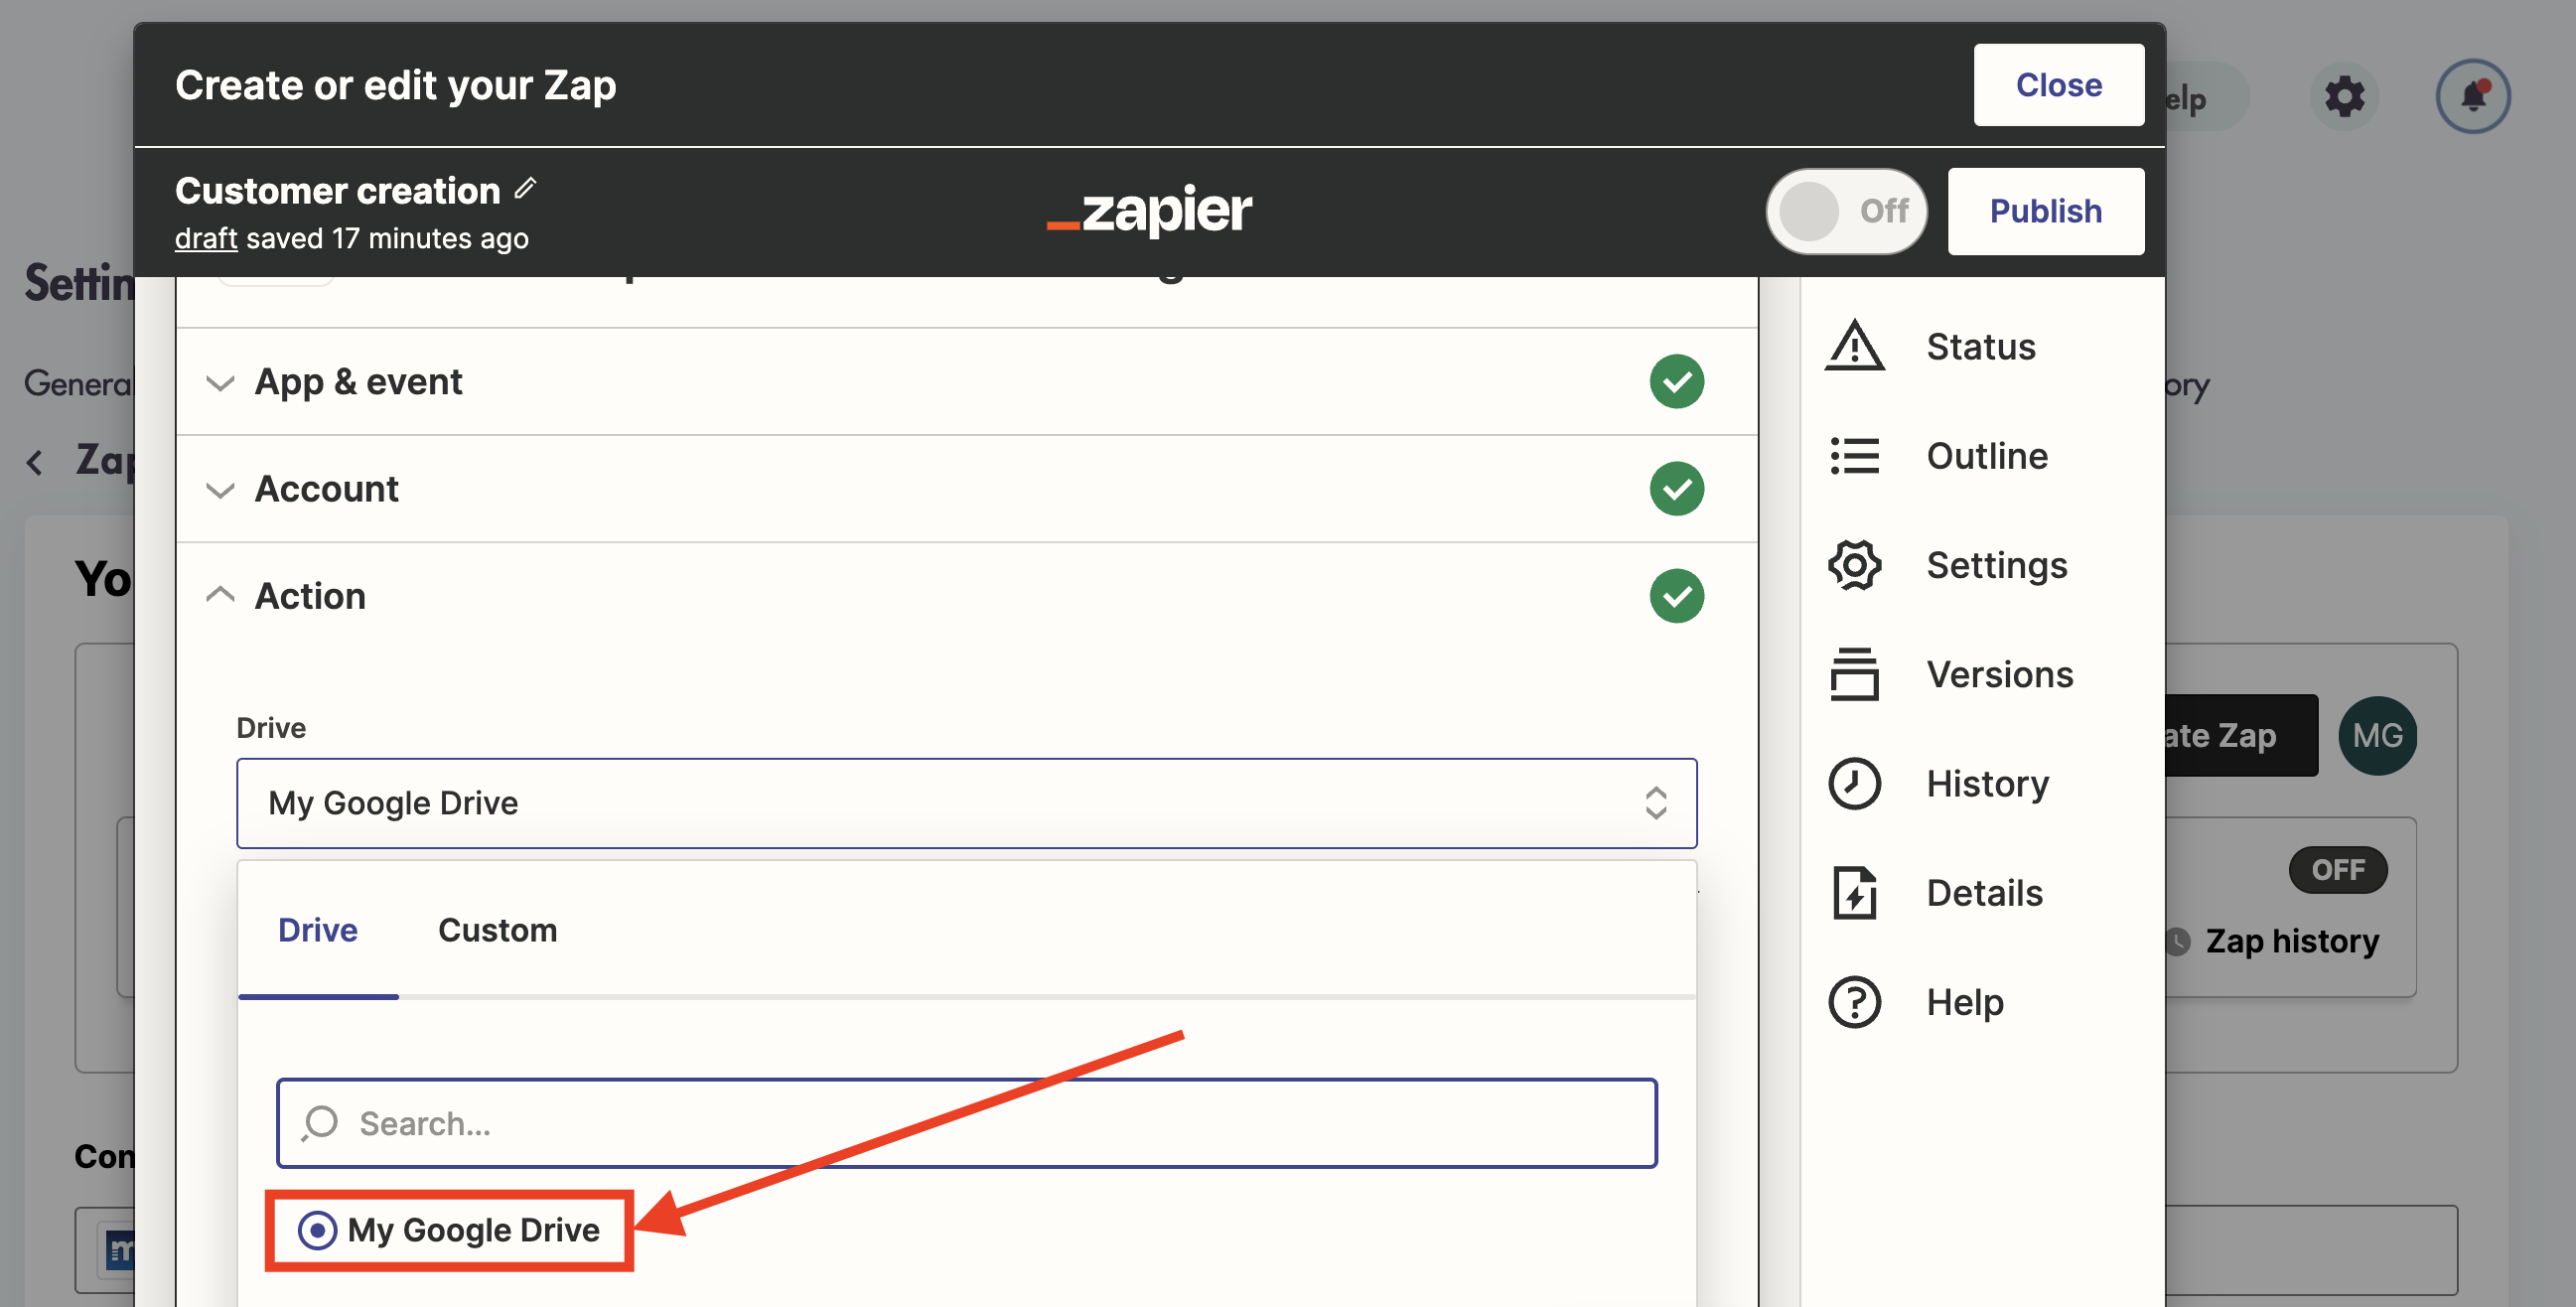
- You can select 'Custom' for values defined by Maidily
- Next we will select the exact spreadsheet in My Google Drive where we want the values to go
- Next we will select the specific worksheet in which we want the values to go
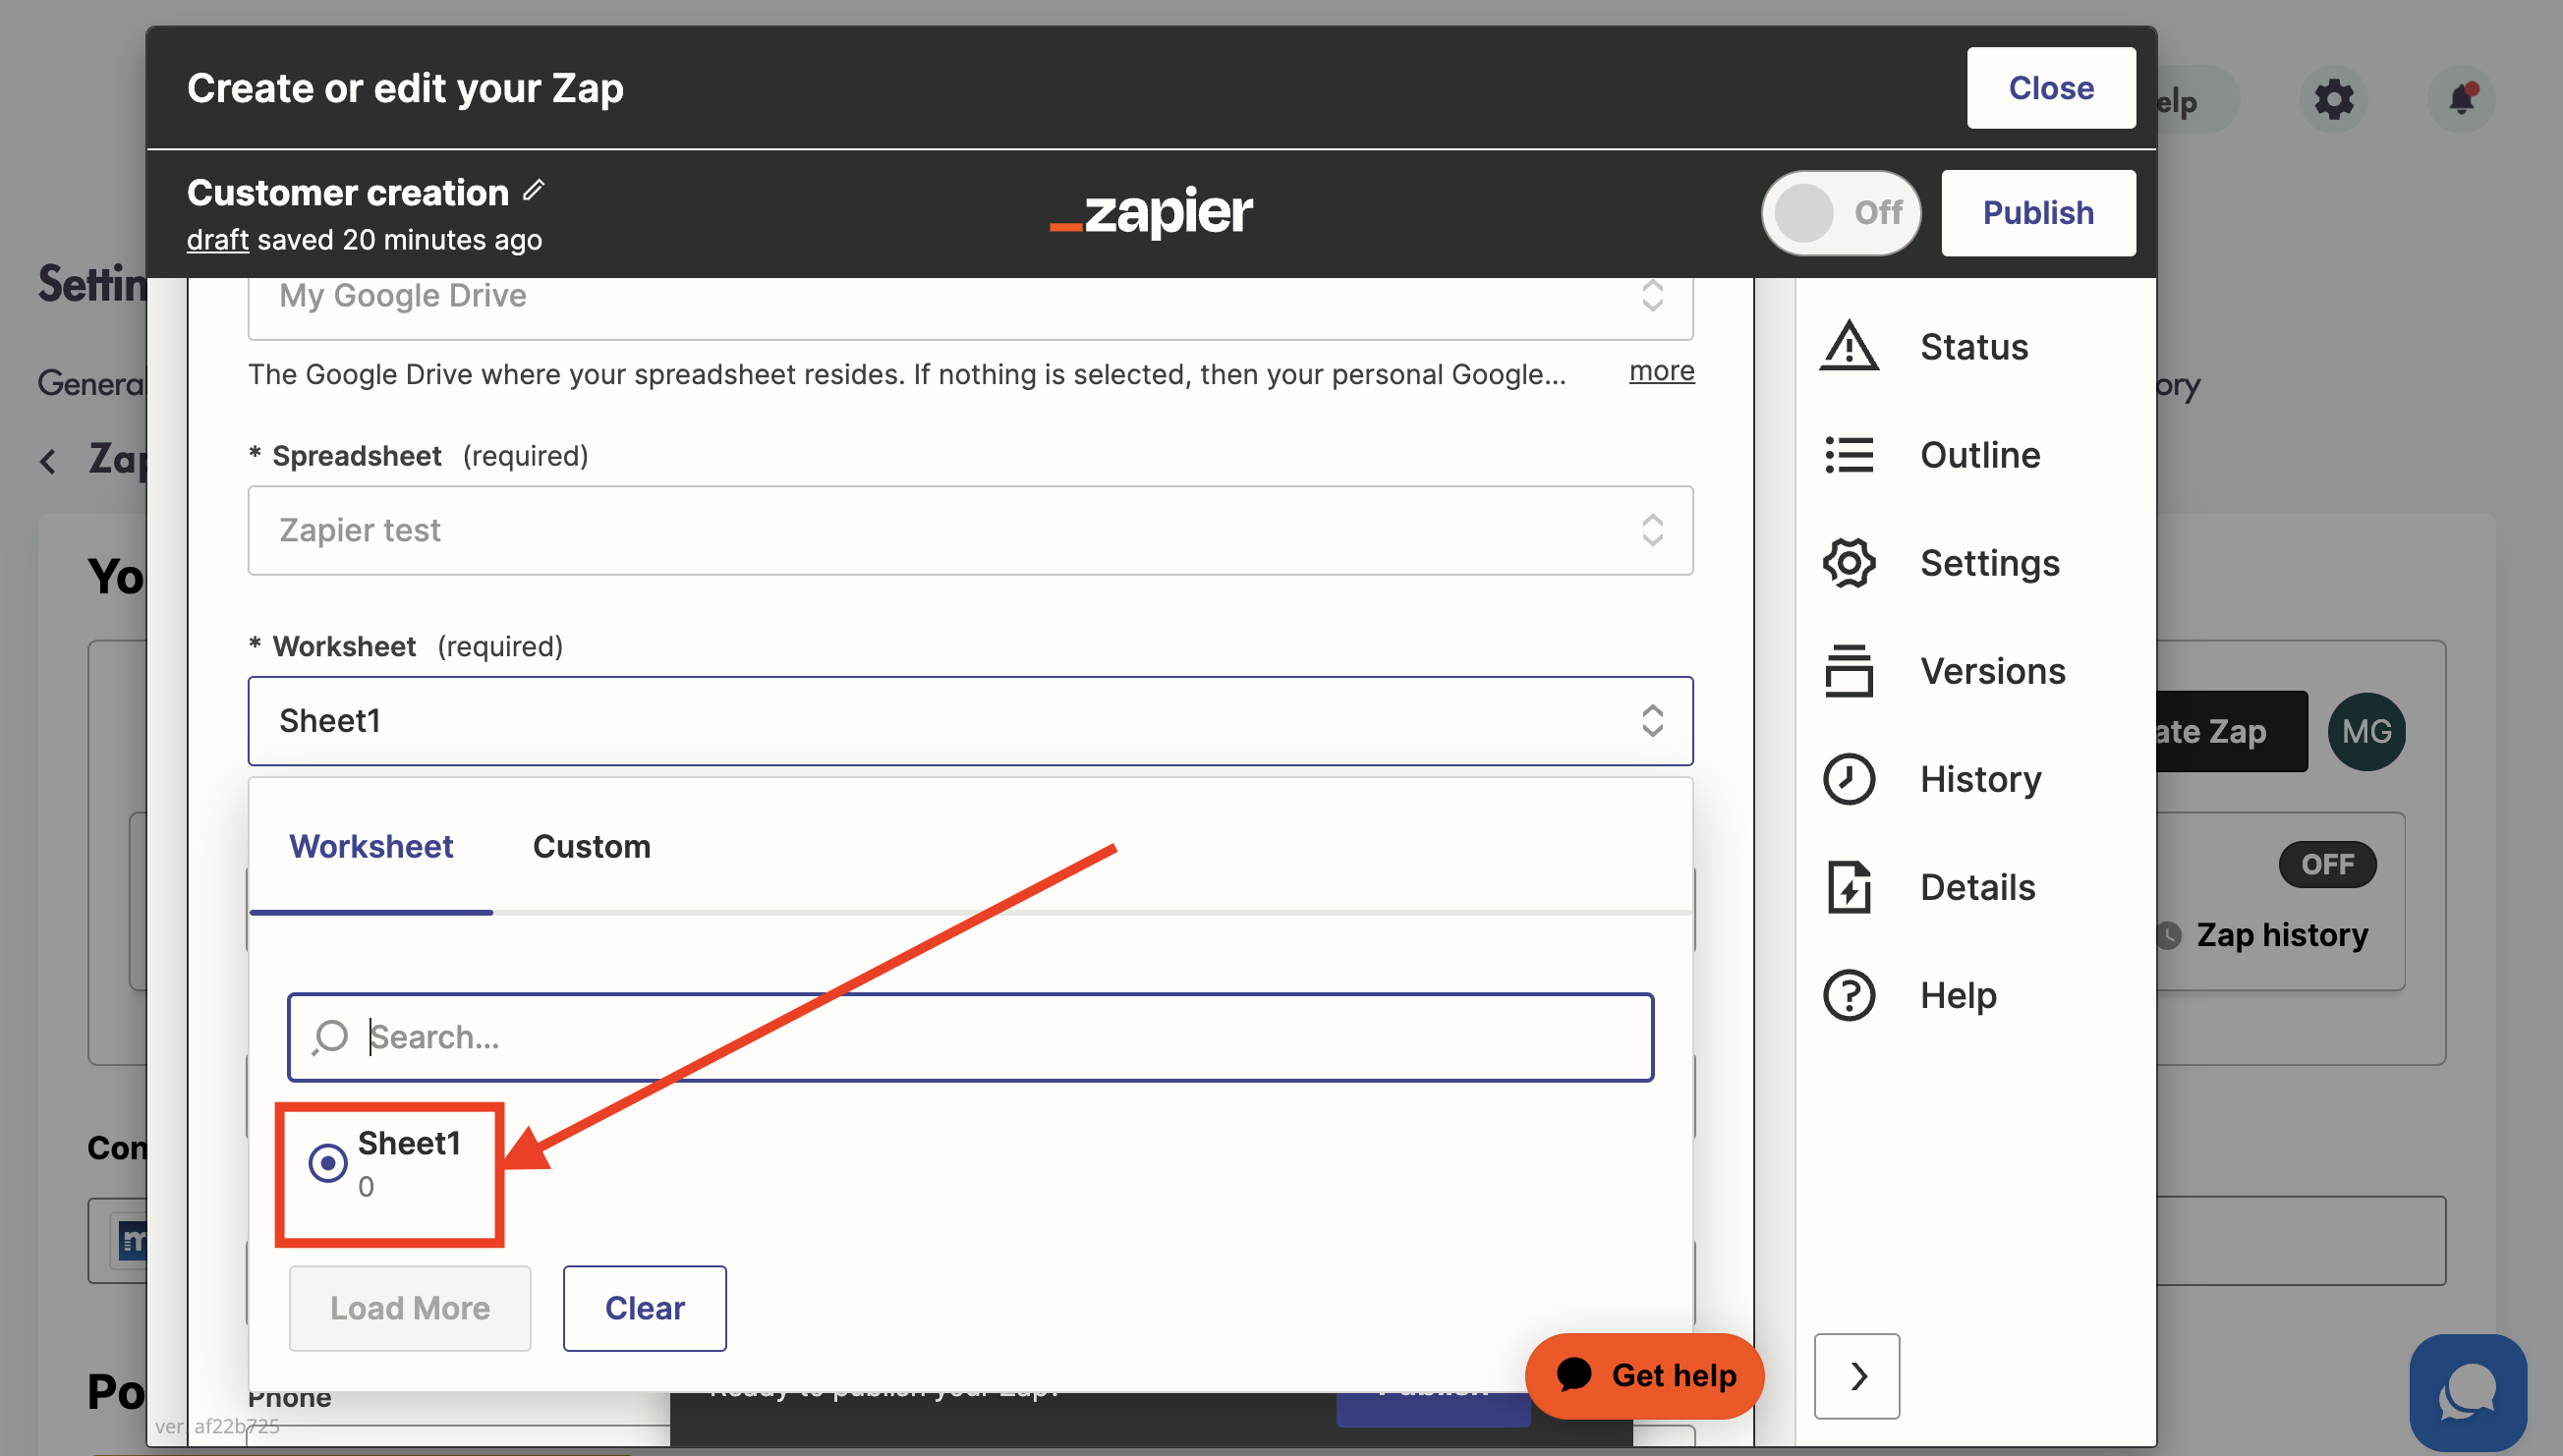
The Google Sheet MUST have already labeled columns created so that you can select where the values from Maidily will go
- Next we will select the values for each field that exists in the Google Sheet
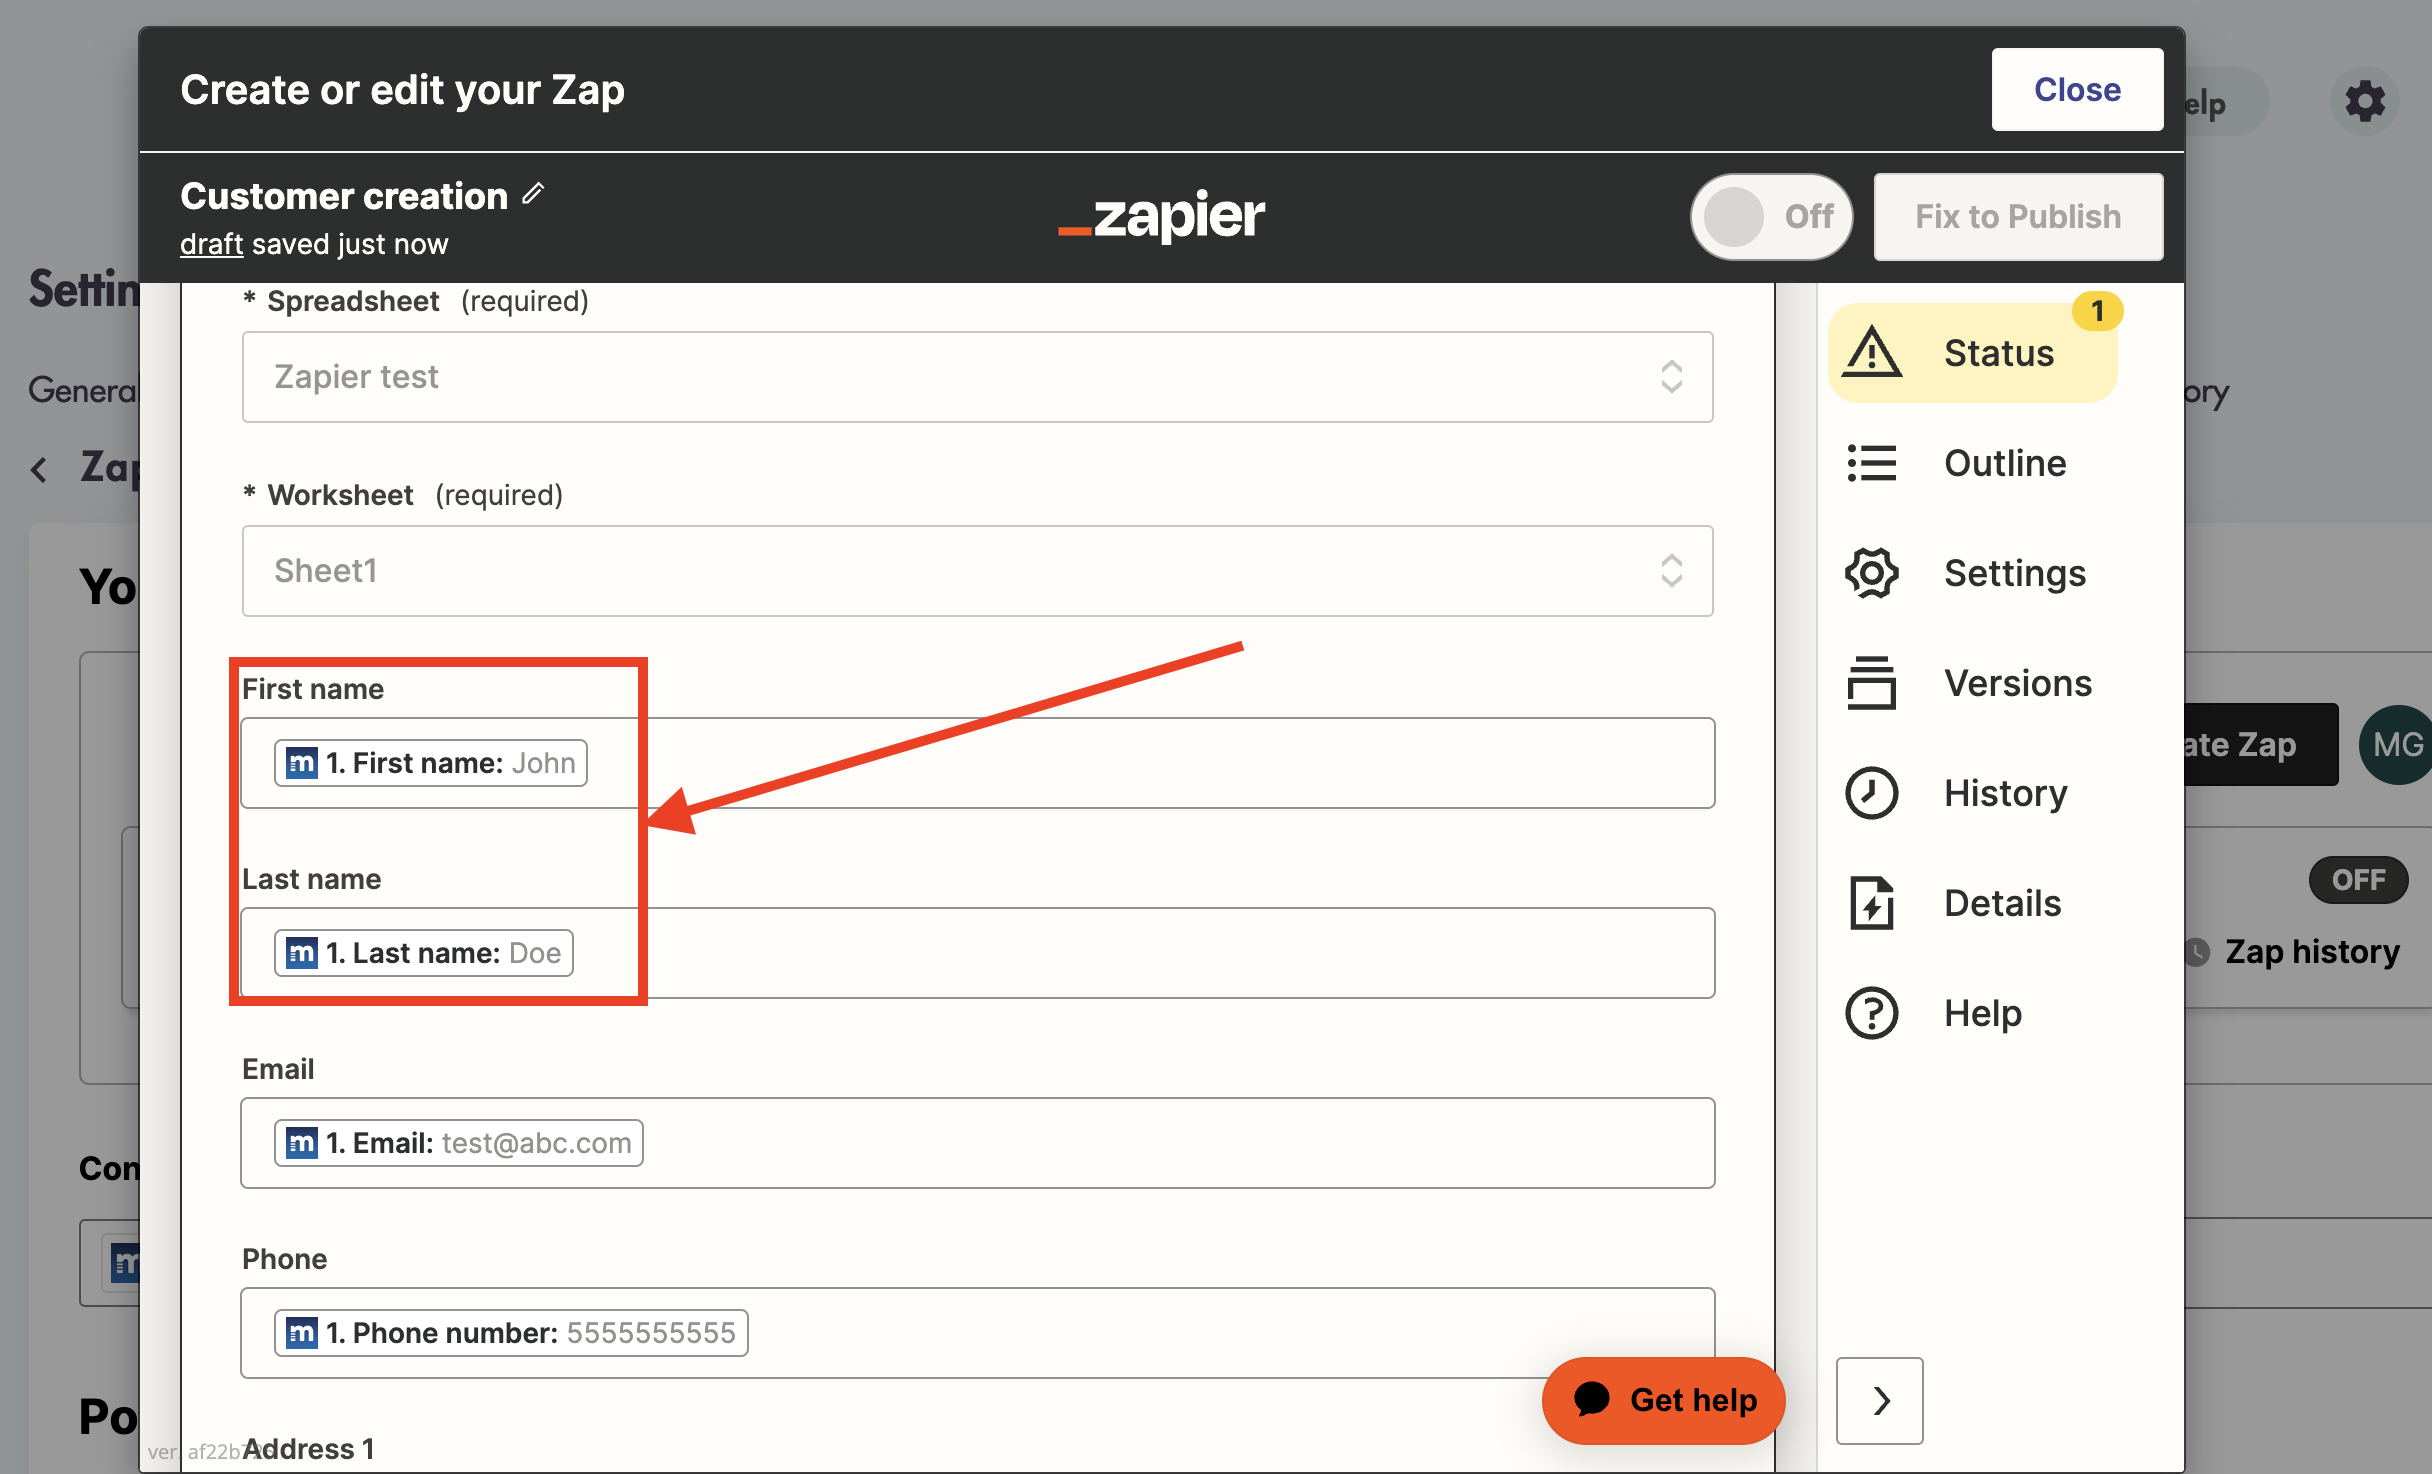
- Click 'Continue' when ready
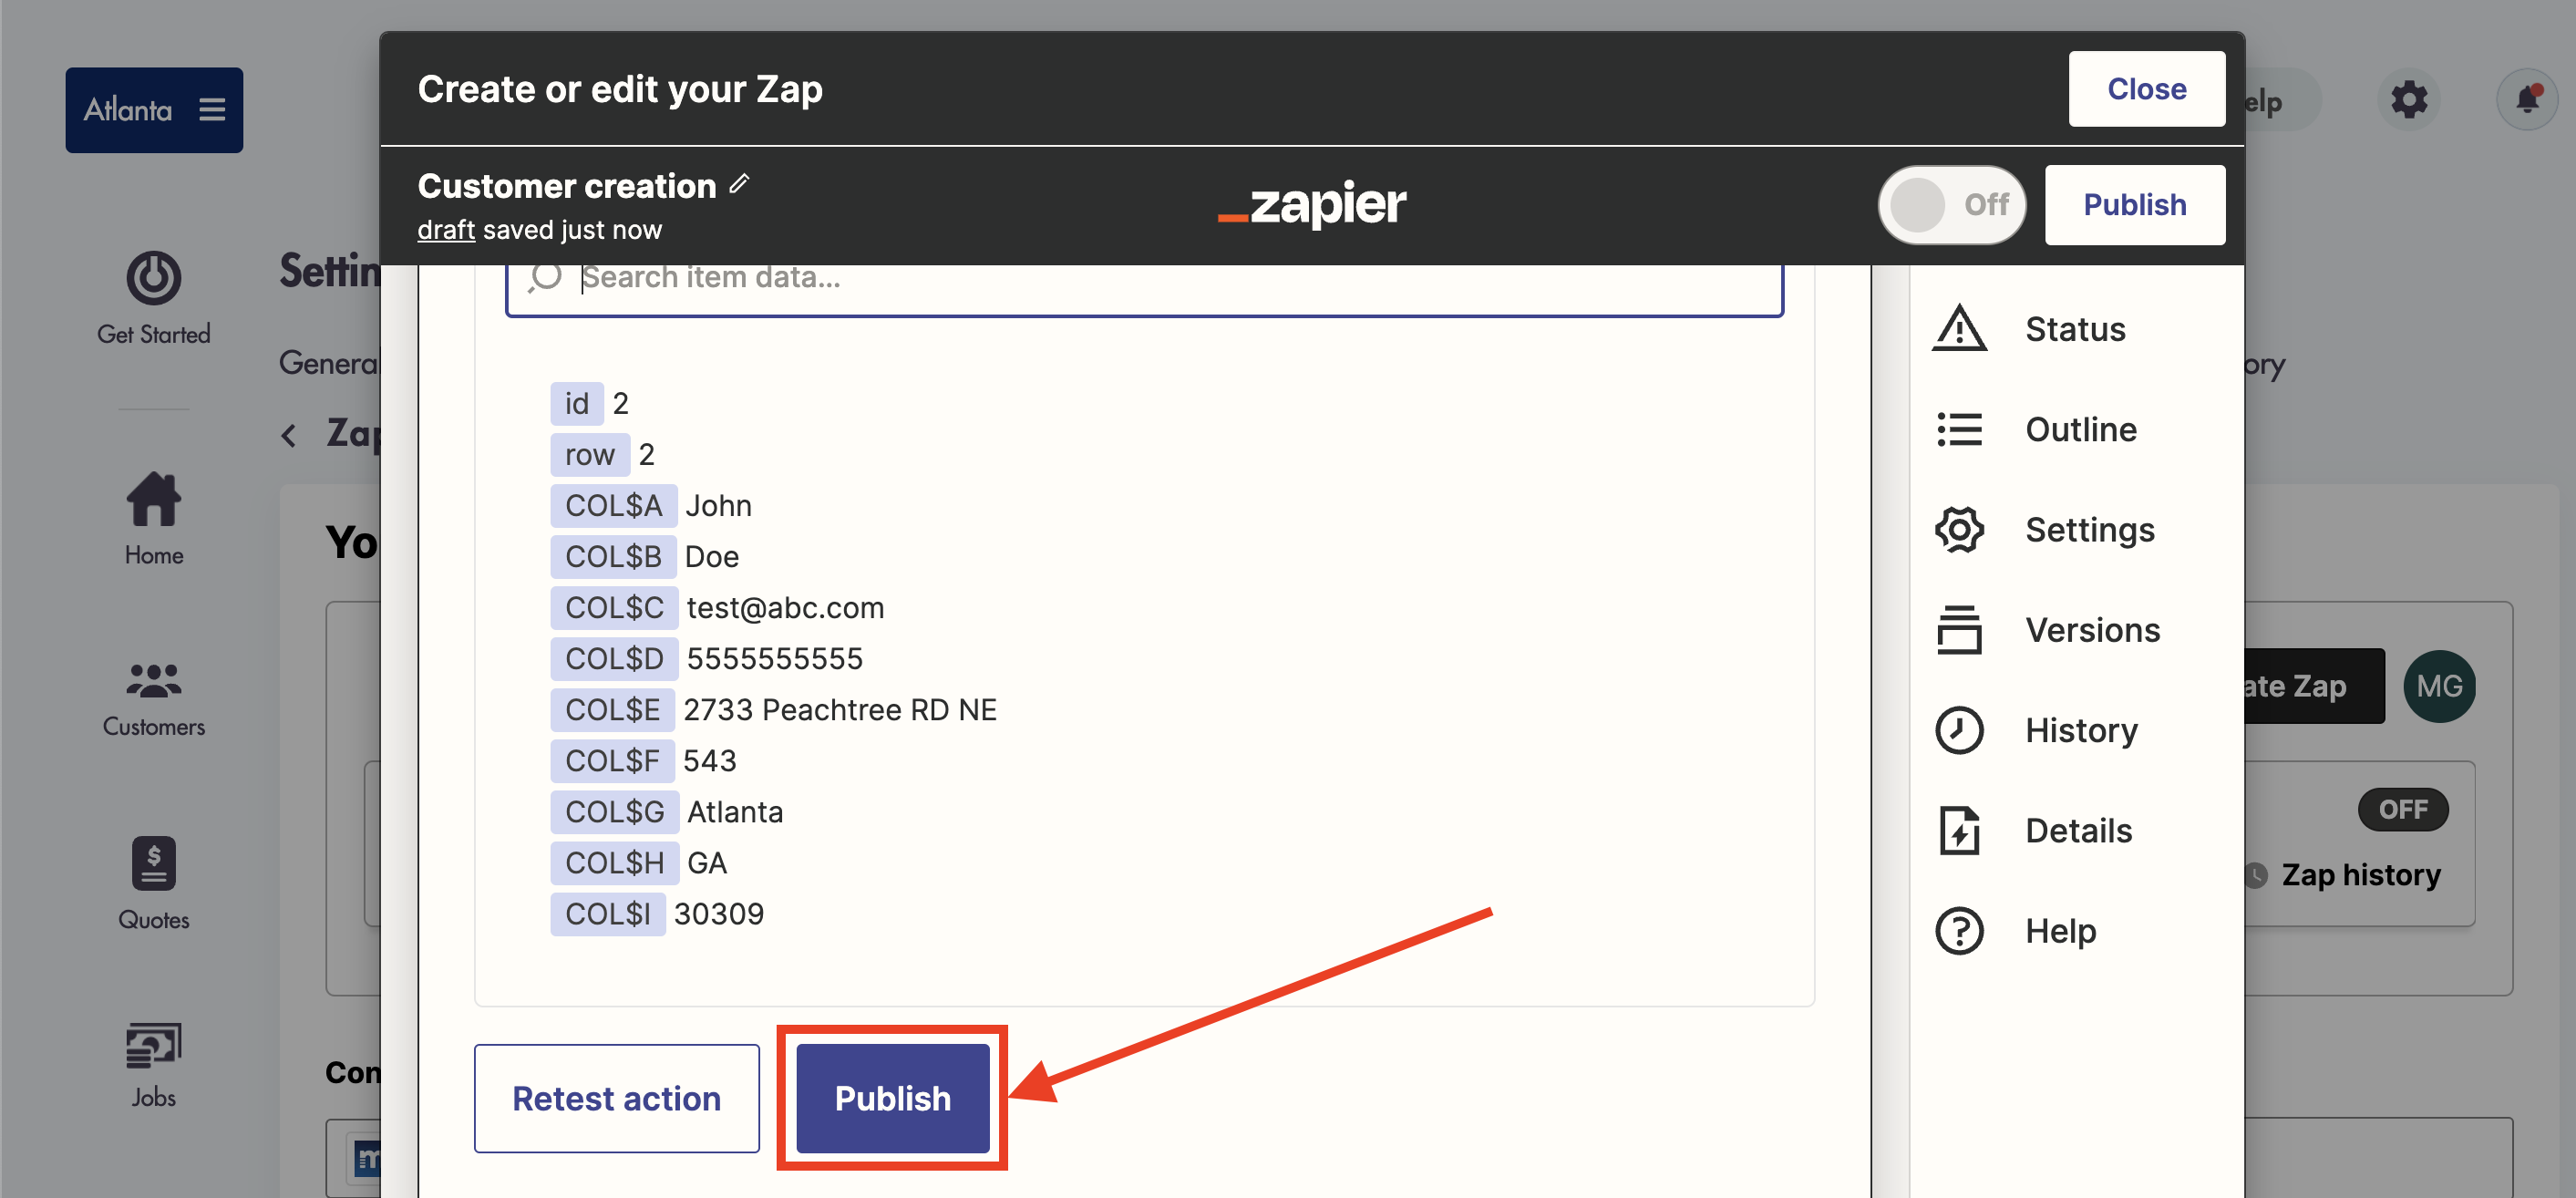
- The test record previously chosen or created will be displayed

- Click on 'Test action'
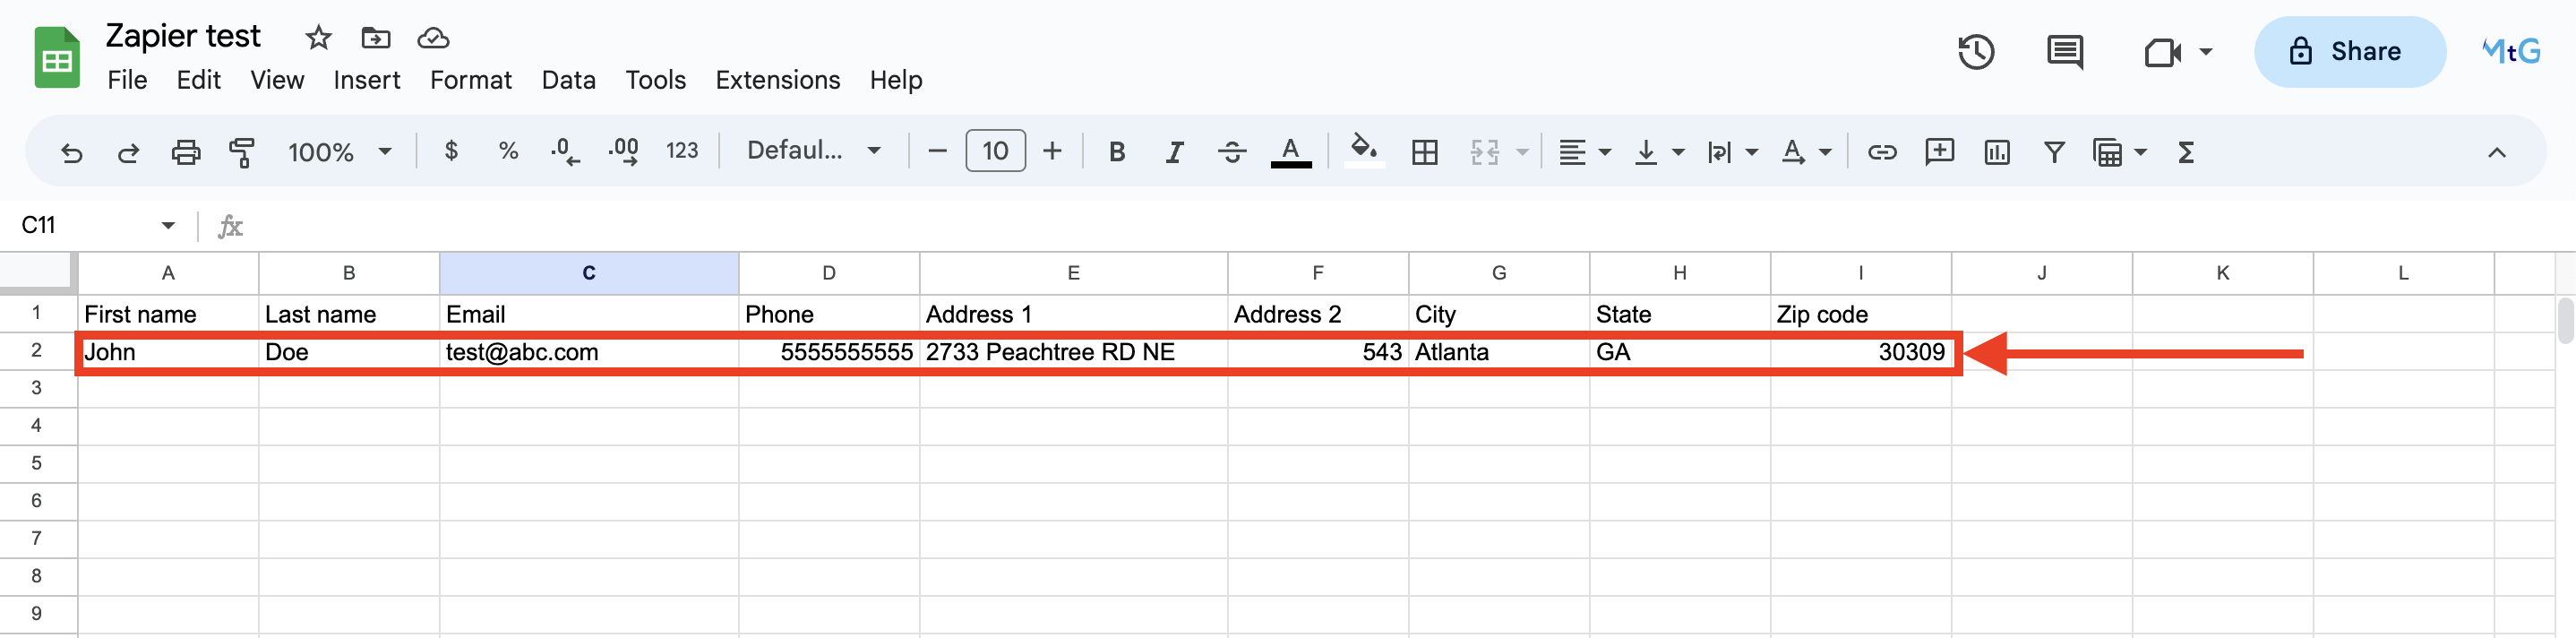
- Once the test is completed you can check to see if it worked
- To check, log into your Google Sheet and see if the test data that Zapier used has been automatically entered
- Once you ready click on 'Publish' and your Zap will be live!
- You can check your Zaps by logging into Zapier or from Maidily (Settings -> Integrations -> Zapier)
Considerations:
-
The Zapier interface may change from customer to customer as Zapier upgrades/updates their own experience but the workflows will stay the same
-
We do not control the events offered by other applications on Zapier
-
We do not have control over apps that are currently not on Zapier
-
Zapier is offered for FREE but they limit the number of Zaps you can create
-
There are no limits to the automations and combinations you can make in Zapier
Relevant articles:
Need more help with Zapier? Email us at help@maidily.com