An invoice is automatically created once you have created a job in Maidily. The invoice is populated by default from the job details on the job.
You can add custom line items to the invoice and you can also send that invoice to your customers and they can pay it online (Square/Stripe integration required).
Prerequisites for creating an invoice:
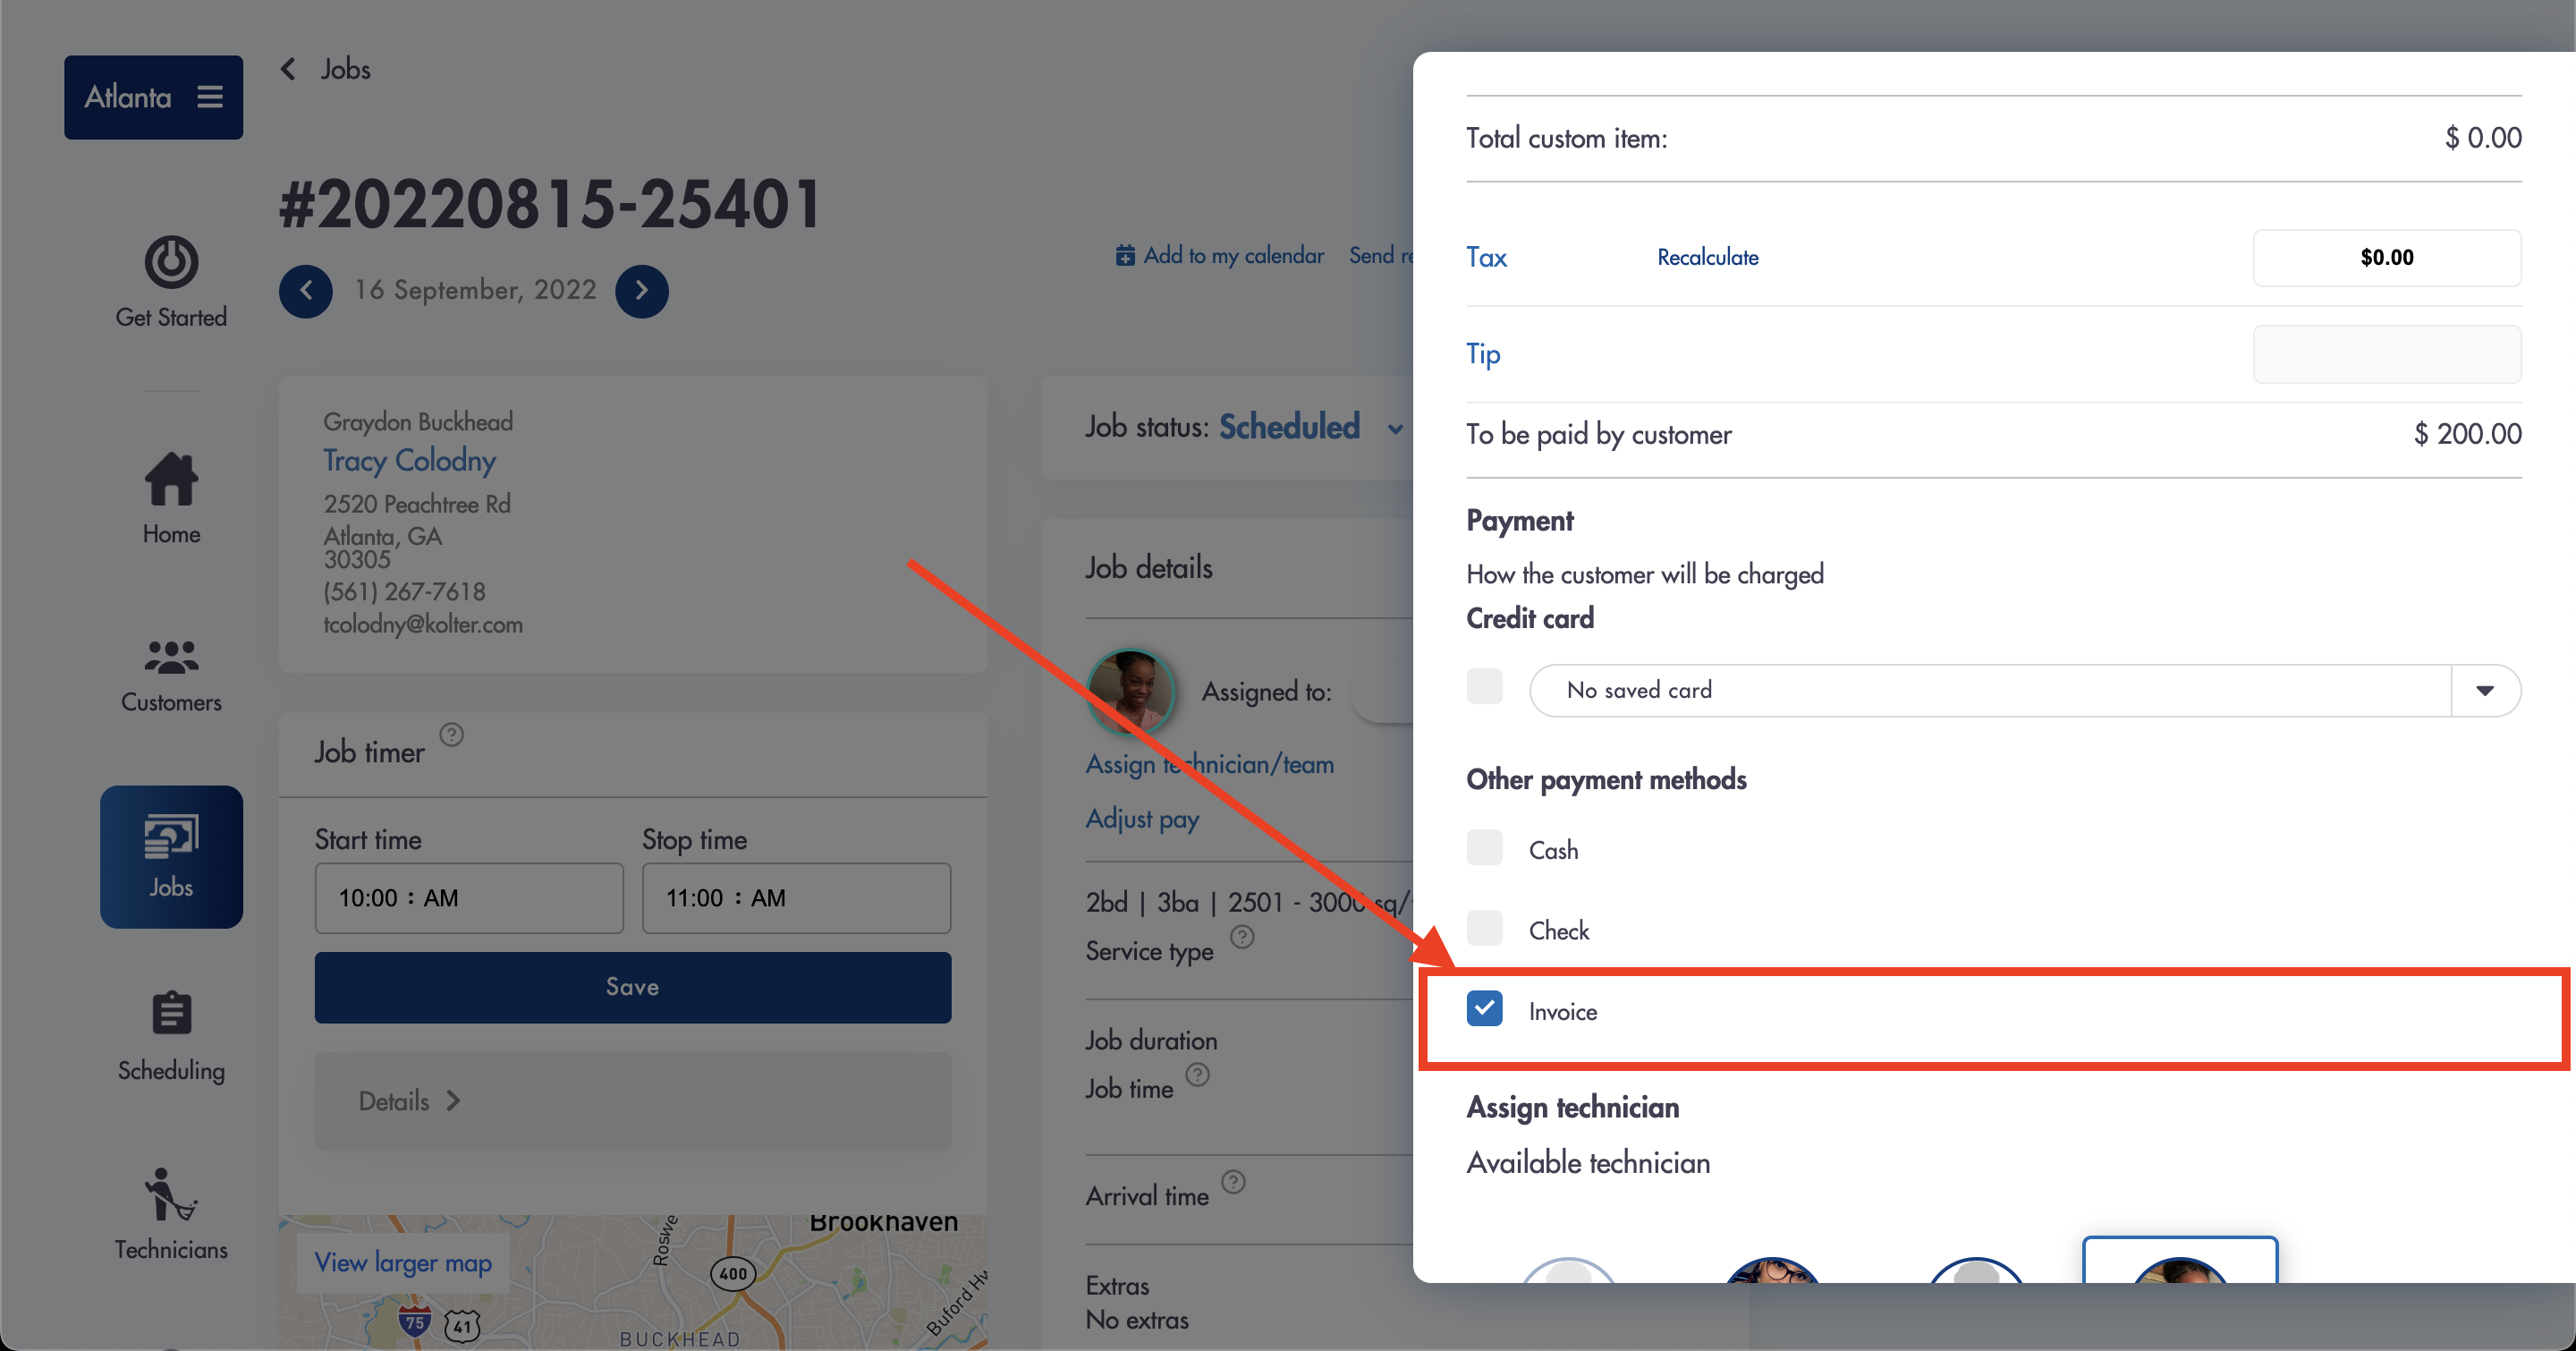
B. Create a job (when creating a job you can choose 'Invoice' as a payment method but it is NOT required)

- You can add custom line items that will show up on the invoice (not a requirement)
- You can see the line items being added in the 'Payment details' section to the right
- Click on 'View/Send Invoice' in the top right when ready to preview and send
- Clicking on 'Send Invoice' will send the invoice to the customers email
- Once the Invoice is sent the Job status will automatically be set to 'Invoice Sent'
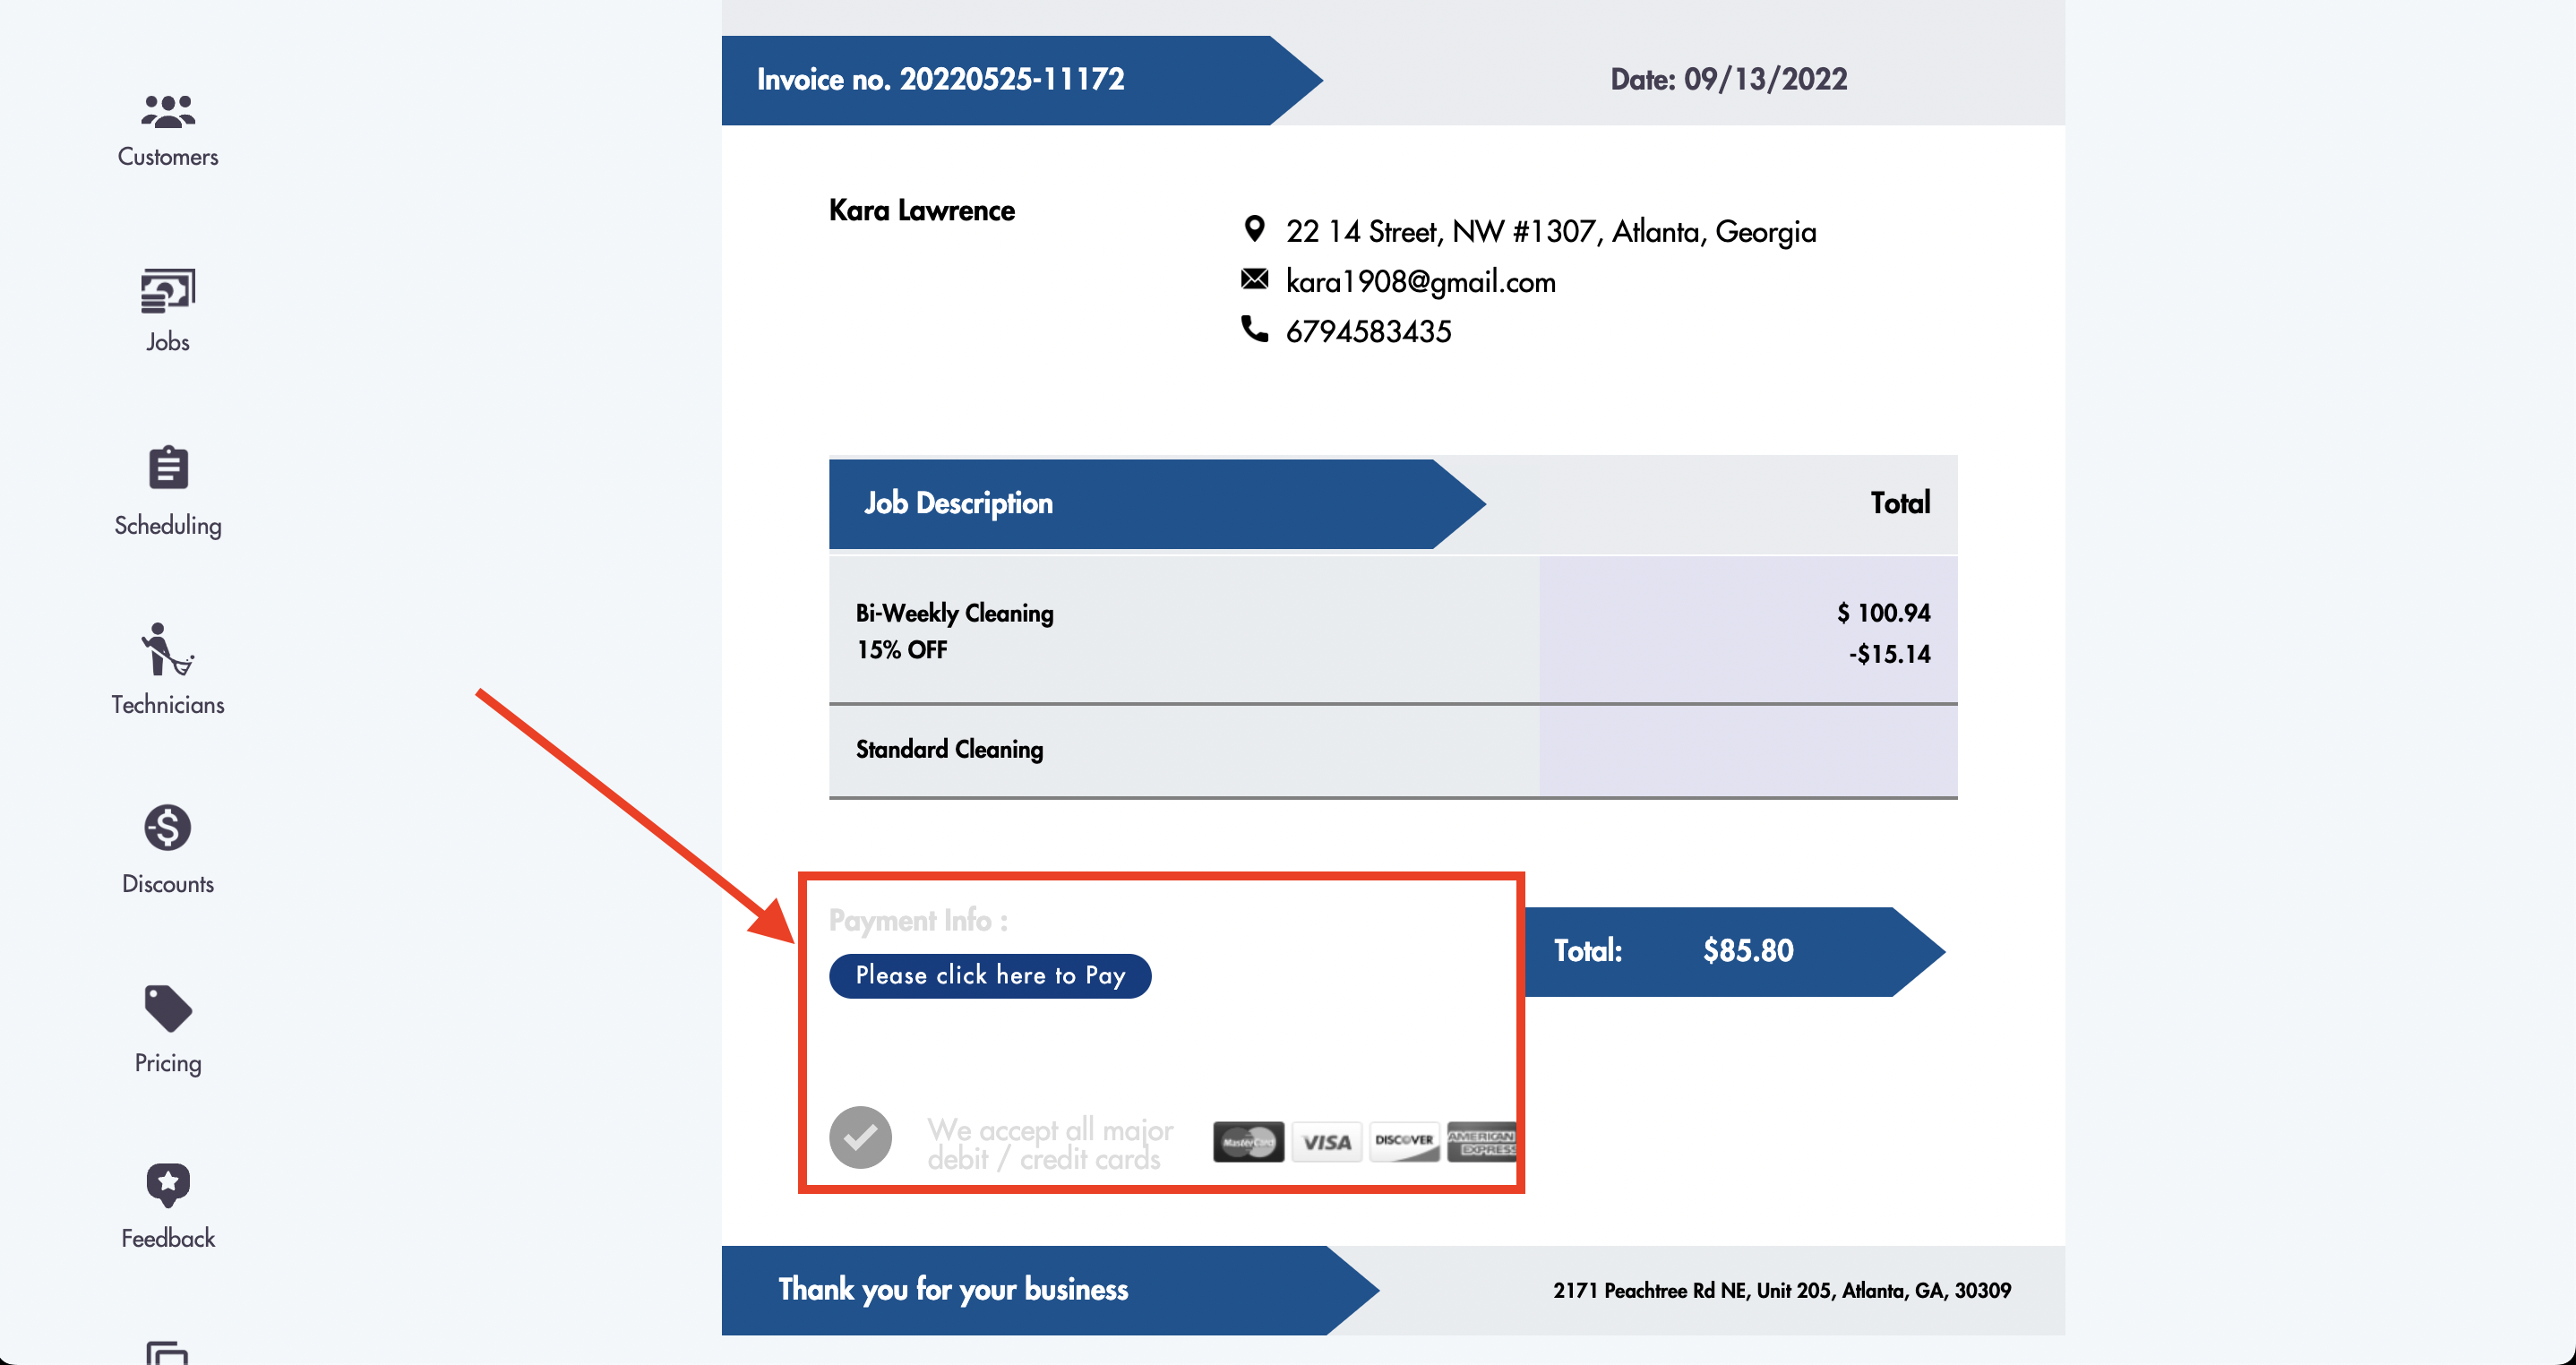
- Your customers can pay the invoice online through a secure link that will appear at the bottom of the invoice for them if you have integrated your Maidily account with Stripe or Square once the invoice is sent out

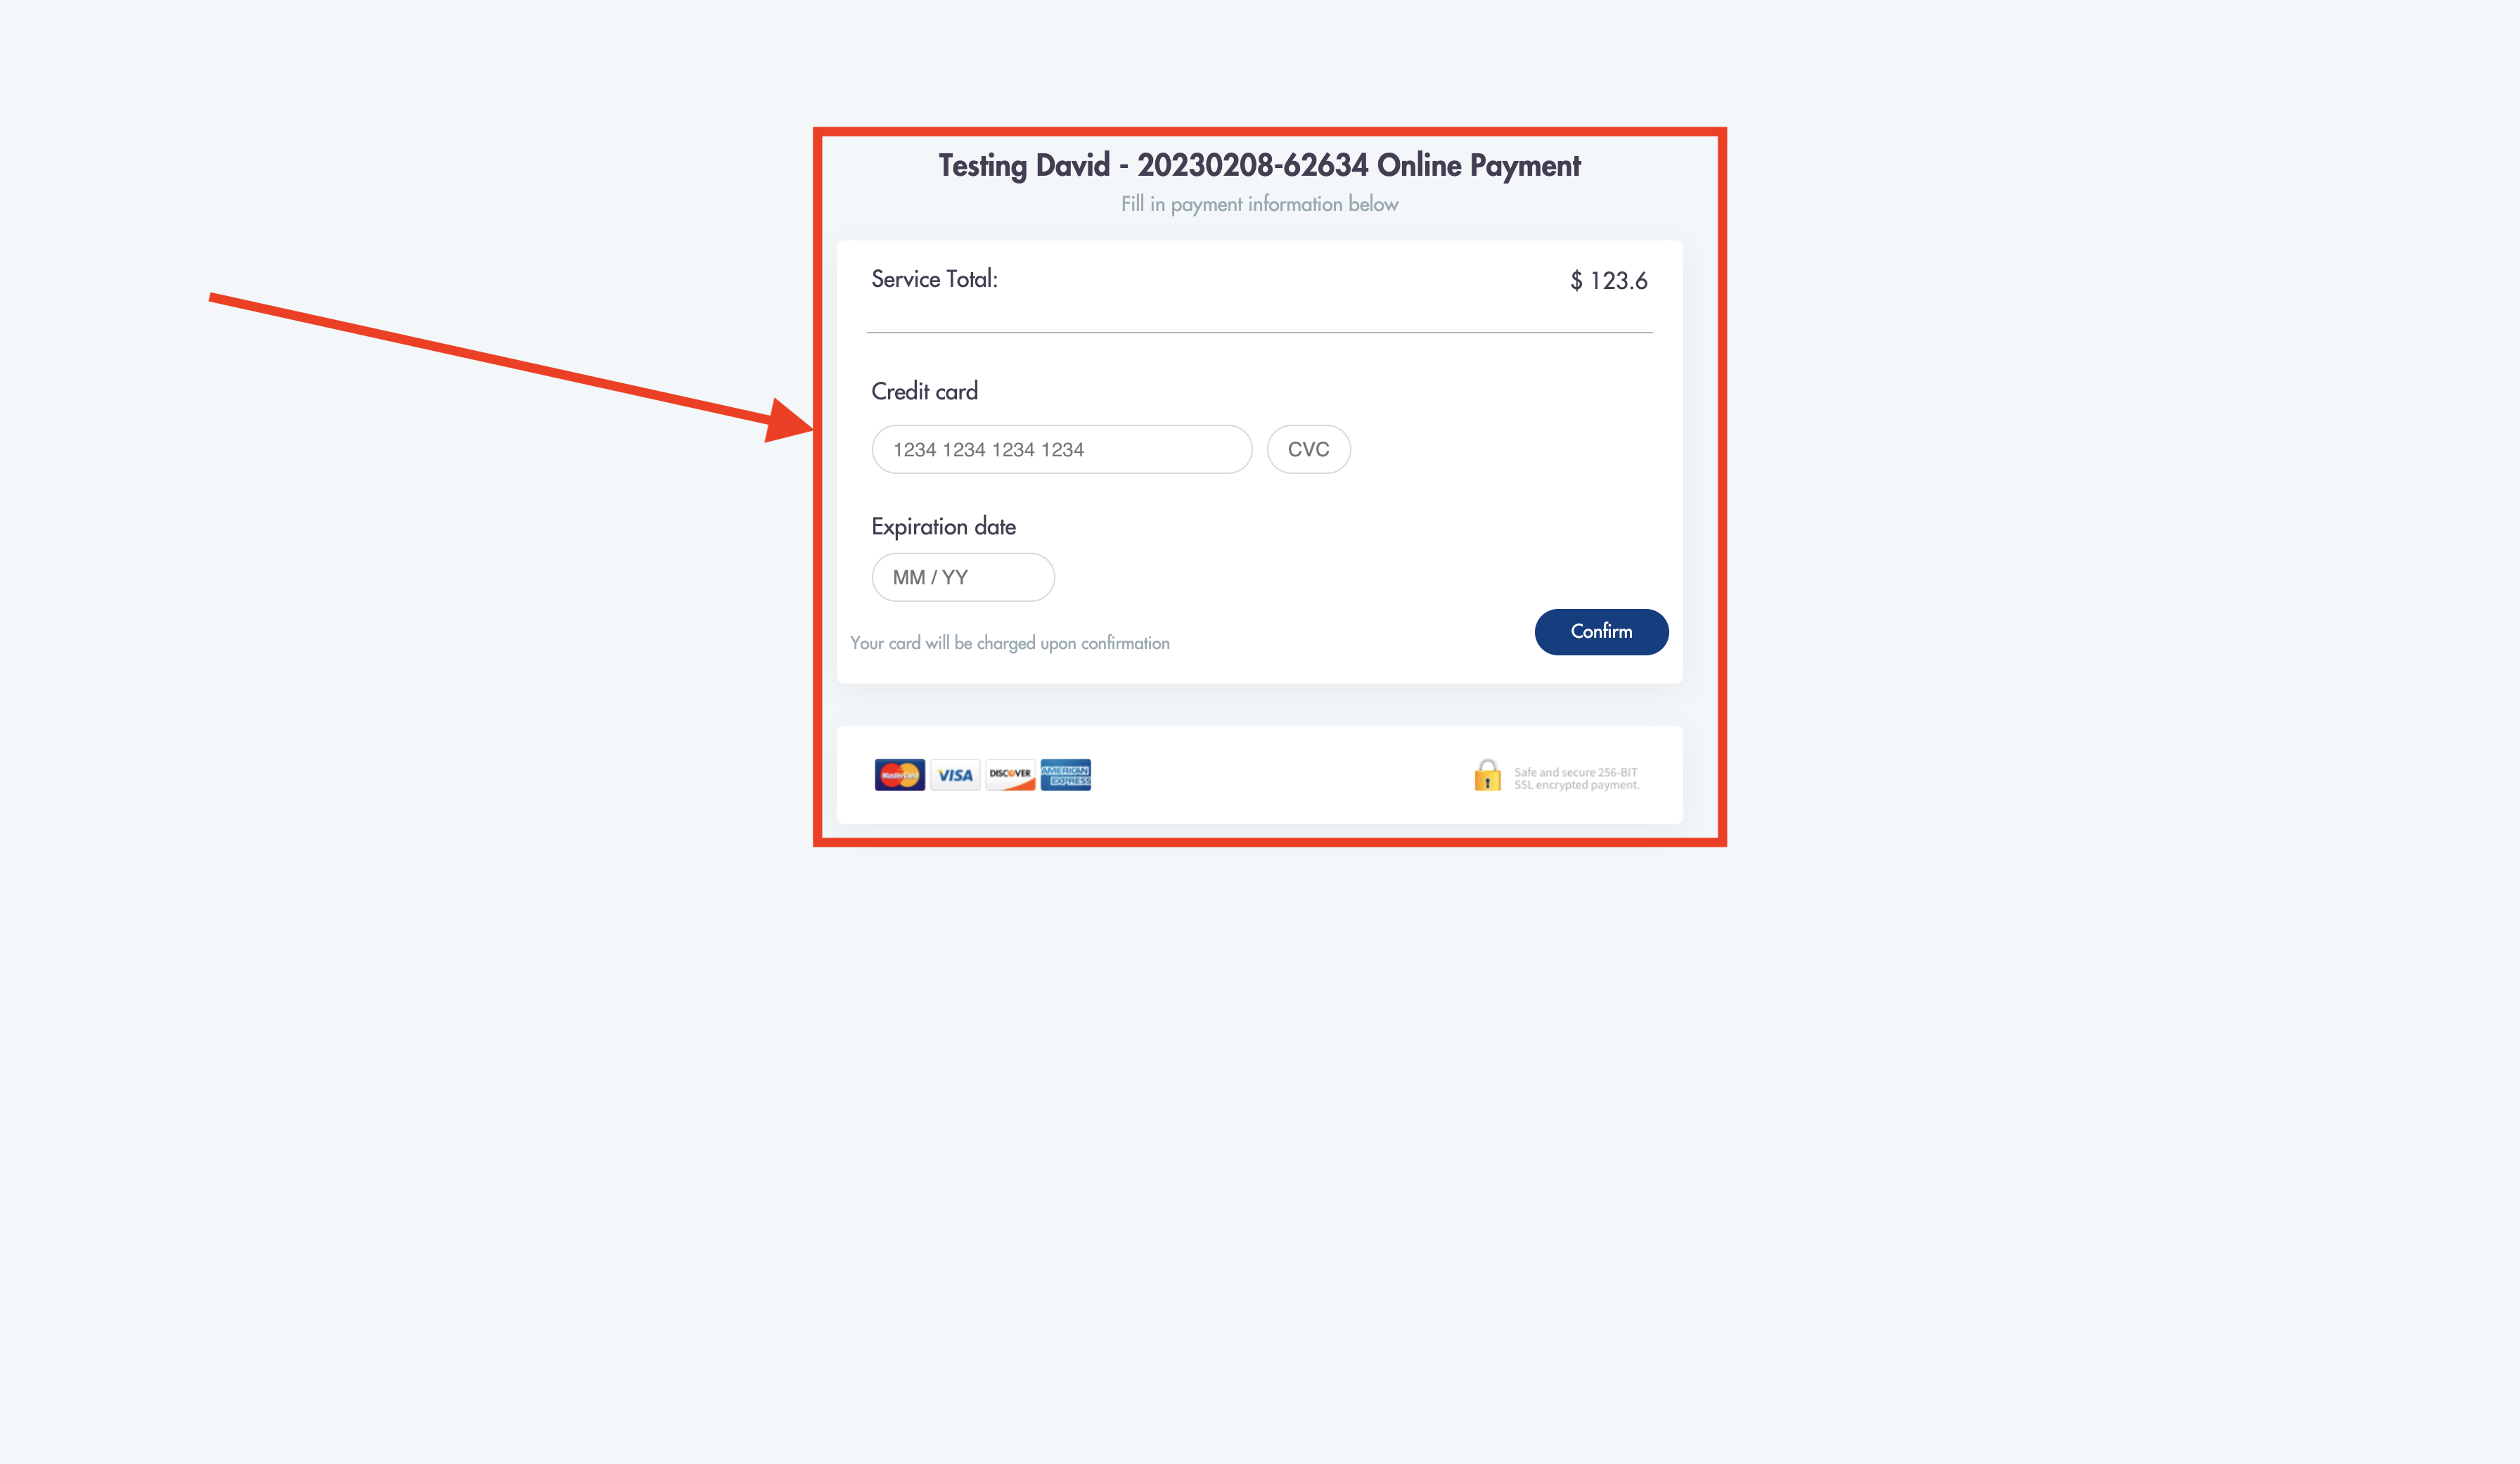
What your customers will see when they pay the invoice online:
.png)
Manually changing an invoiced job status to 'Paid':
Sending an invoice to your customer and marking it as 'Paid' inside of Maidily, manually - by charging the job - will NOT charge the customers credit card (regardless if you have 1 on file).
Charging a customers card on file:
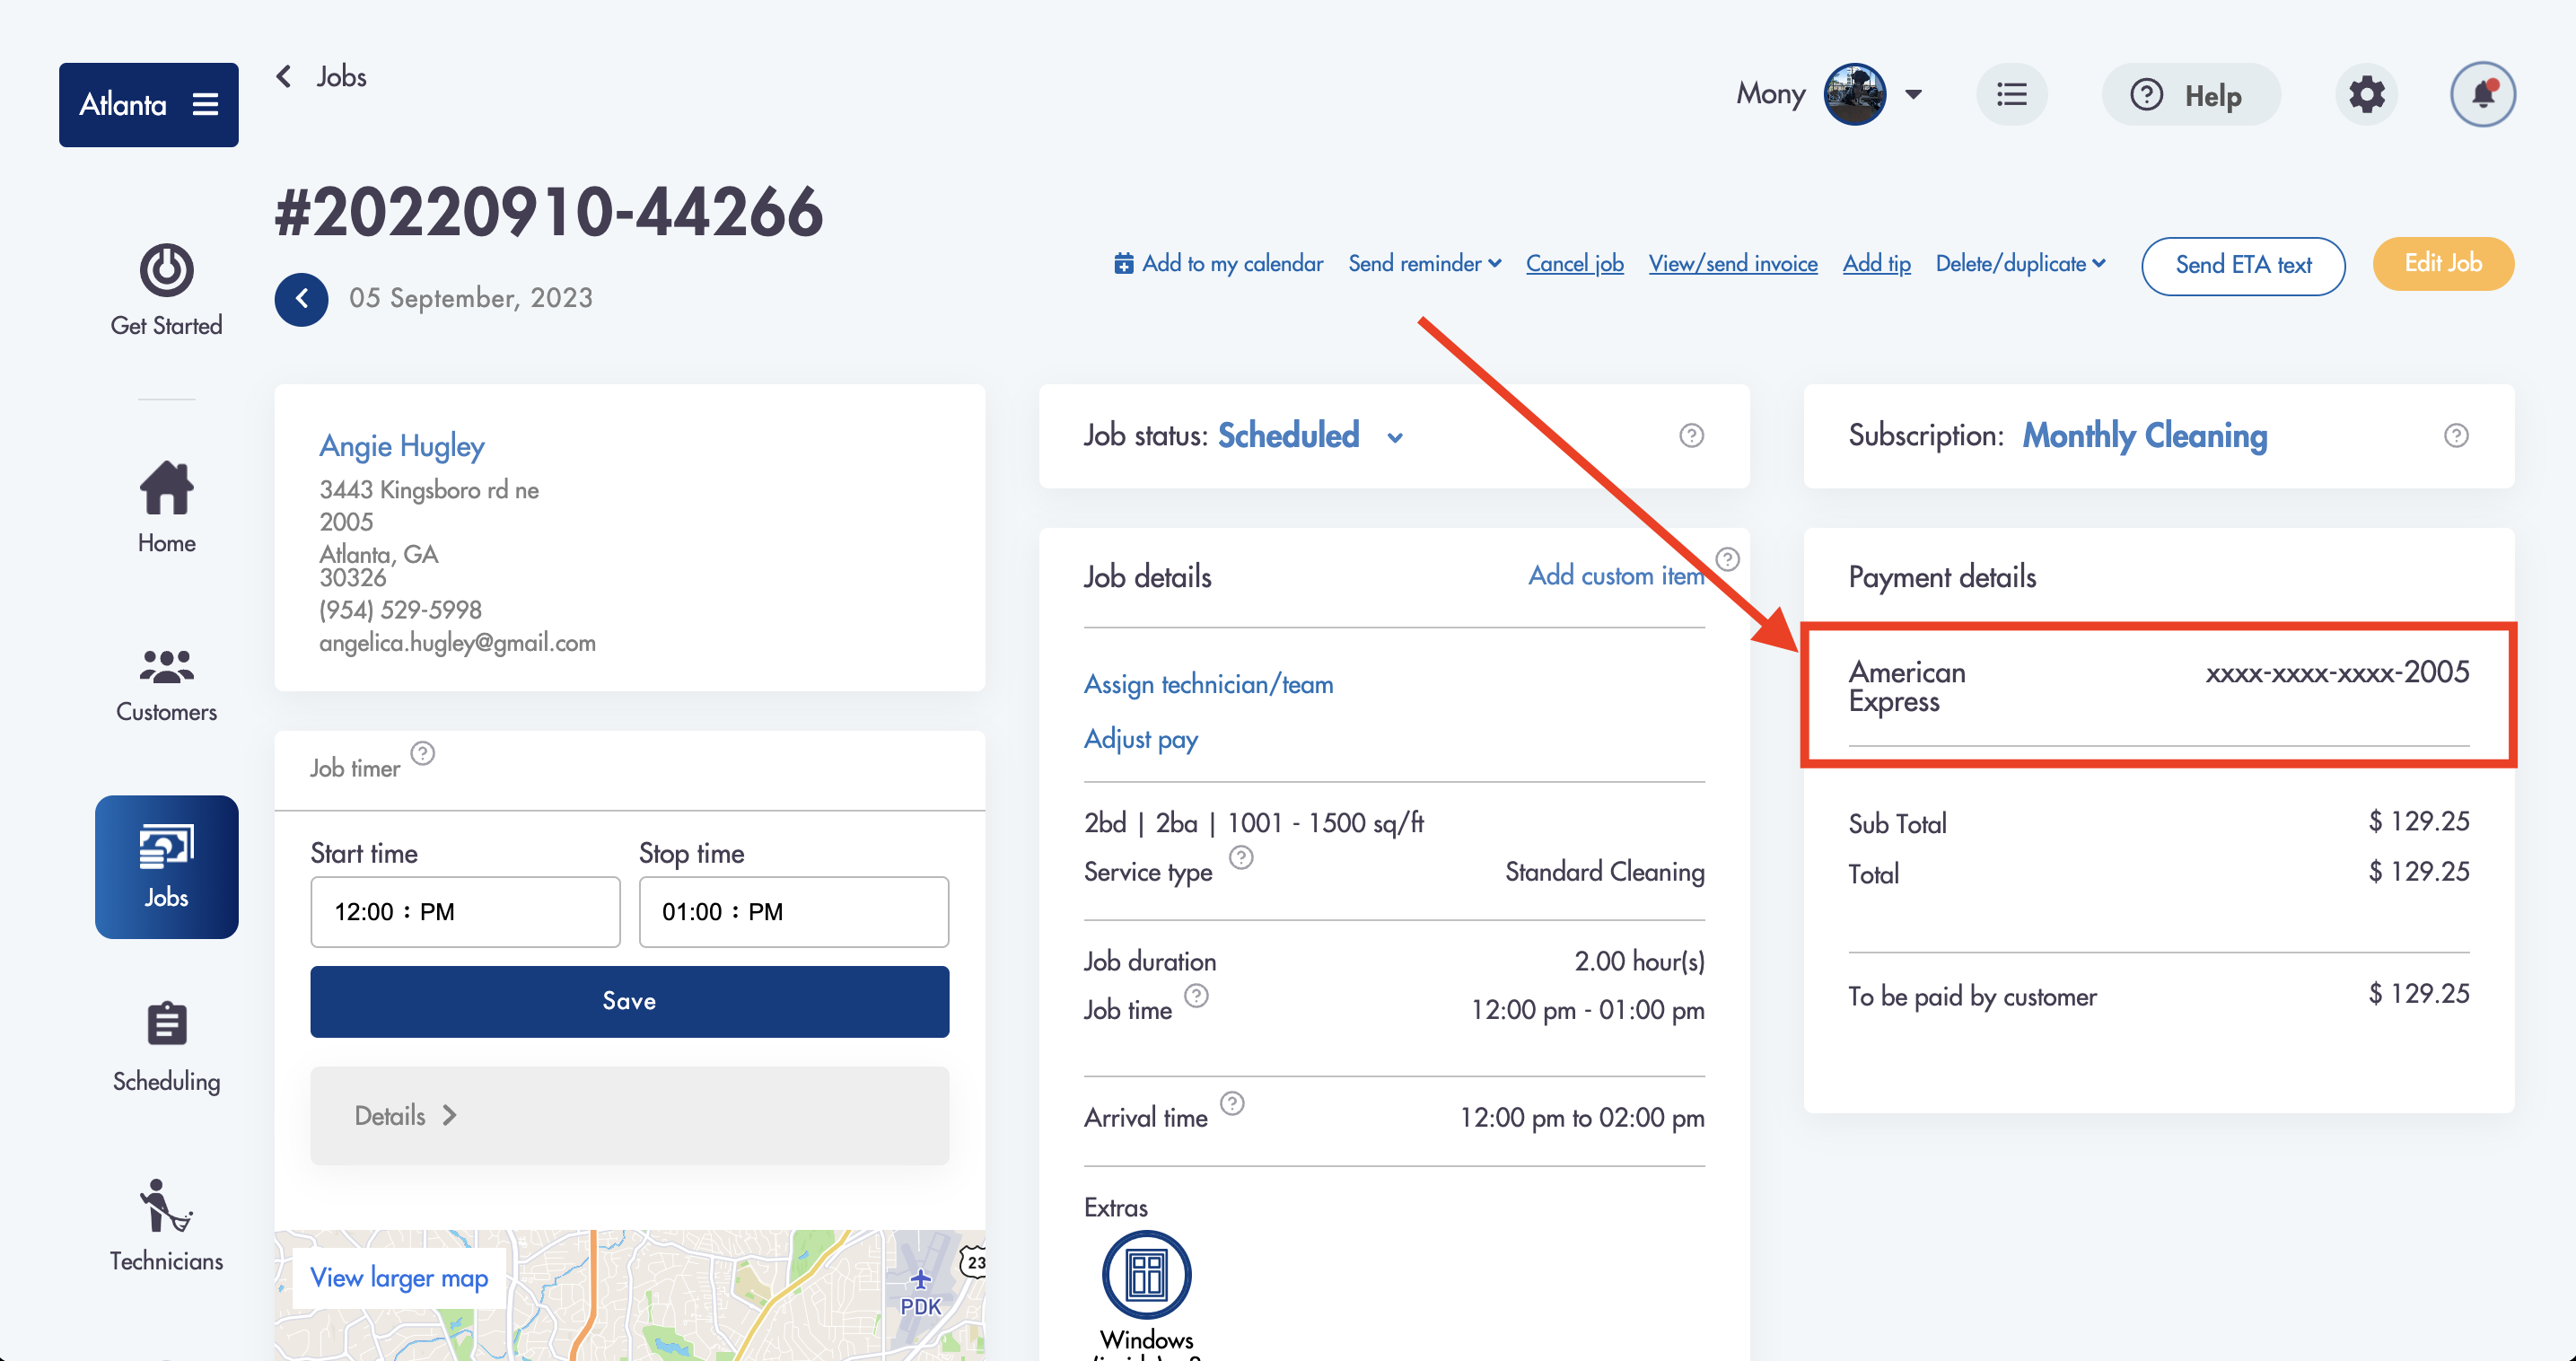
In order to successfully charge a customer's credit/debit card you MUST have it selected as the payment type in the job under the 'Payment details' section.

Related articles:
Need help with invoices? We can help! Email us at help@maidily.com for 24/7 support